Making Maple Syrup in the City
Do you have maple trees on your property? If so, with a just a few basic supplies and plenty of time you can be making maple syrup right in your own backyard in spring.
I bet you thought tapping trees and making maple syrup was strictly a rural practice! Well, I’m here to tell you it can be done in the city. We’ve successfully made syrup in our backyard, smack dab in the middle of the city.

We’re lucky to have two big sugar maple trees on our very small property. Those two trees flow like crazy in the spring, and when the conditions are right we collect five gallons of sap a day.
If you have maple trees on your property that are at least 12-inches in diameter, you can tap them to make maple syrup too! One tap can produce from 5 to 15 gallons per day depending on the tree and the weather. It takes about 10 gallons of sap to produce a quart of syrup.
When to Tap Maple Trees for Syrup
The time to tap depends on your weather conditions. Generally, sap begins to flow somewhere between February and March once the daytime temperatures rise above freezing, and nighttime temperatures stay below freezing.
This triggers the tree to wake up from its winter slumber. Rising temperatures generates pressure in the tree that makes the sap flow. Once the sap begins to flow, it usually runs for about 5 weeks.
How to Process Sap into Maple Syrup
While it’s easy to make maple syrup, it is surely time consuming. You’ll need patients to collect the sap each day, and plenty of time to boil down the sap into a concentrated maple syrup. It is so worth it though.
We learned our first year that it’s a bad idea to boil sap indoors due to the extreme amounts of humidity. Instead we borrow a propane fired turkey fryer, and set up in the backyard to boil down the sap.
It takes two days of boiling in a large pot to get the sap down to a reasonable volume that we could move onto the stove inside. Once inside, the sap continues to boil for another few hours until the sap becomes syrup.
What You Will Need to Tap Trees
- Maple Sugar Starter Kit (includes 3 metal buckets, 3 metal lids, 3 spiles, proper sized drill bit, and cheesecloth.)
- Battery powered drill
- Hammer
- Maple syrup filters
- Large, food grade containers to store sap until you are ready to boil
- Method of boiling sap into syrup outside: We use a propane turkey fryer
- Large pots, lots and lots of large pots
- Large candy thermometer
How to Tap Maple Trees
Selecting Maple Trees to Tap: Select healthy maple trees that are at least 5 feet tall with a trunk that is at least 12-inches. Go easy on your trees and only tap a 12-inch diameter tree once per season. Trees that are between 20-25-inches can have two taps in the trunk. Trees over 25-inches in diameter can have three taps. Don’t go over three or it may stress the tree.
Sugar maple trees are the most productive and sweetest type of maple to tap, but other maples can be used as well. Here is a site that can help you identify your maple trees. Mark your trees to make it easy to tap the following spring.
Decide Where to Tap: Locate the tap hole at a height that makes it easy to collect the sap, usually around 3 feet so you don’t have to bend over. If your tree has been tapped before, try to locate the new tap on another side of the trunk, about 6-inches away.
This is where we tapped last year.

Drill the Holes: Pick a warm day to drill your holes. There is little more give on the tree if the trunk is not hard and frozen and less chance of splitting.
Use your drill to make a hole at the depth required for your spiles. Make the hole horizontal or slightly angled upward so the sap flows down. Only tap into healthy, white wood. Don’t use if the hole shows dark-colored wood. This may not give you much sap and it may give your batch an off flavor.

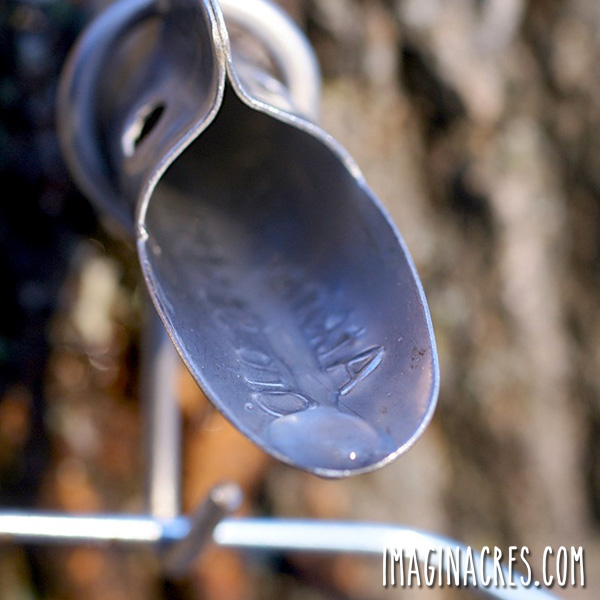
Attach the Taps and Buckets: Insert your spiles into the hole right after drilling. Use your hammer to tap them in gently so as not to damage the tree.
Fasten the buckets to the spiles and attach the lids. Sap should begin running immediately if the weather is warm.
Check the Buckets Daily
Collect the sap daily or several times daily if the weather is warm. If there is ice on the surface, remove it first. Ice is mostly water and will dilute your sap. Pour the sap from the bucket, through cheesecloth or pre-filter to screen out foreign material, and into a clean food storage container.
Store the sap at a temperature of 38˚F or colder and process within 7 days. Collect the sap until you have enough to start boiling. Sap can spoil, so store it in the refrigerator or in buckets packed in snow in the shade.
Stop gathering sap once it begins to look yellow or buds form on the trees.
How to Boil Sap into Maple Syrup
Once you have collected enough maple sap to fill a pot about half way, you are ready to start boiling. Don’t fill the pot all the way to the top or it may boil over.
Begin Boiling the Sap
Place the pot onto the outdoor heat source and begin boiling. Once the sap starts to boil down to half, keep adding more sap. You can pour cold sap right into the boiling pot, but try to maintain a boil.
Keep at least 3 inches of sap in the pot or the syrup may burn. Monitor the sap constantly to be sure it isn’t boiling over or evaporating too quickly.
Use a large candy or deep fry thermometer attached to the side of the pot to monitor the temperature of the sap. The temperature will rise as the moisture evaporates from the boiling sap.
Transfer to a Smaller Pot (optional)
Finishing the boil inside is optional, but I find it much easier to monitor.
As the boiling sap reduces down, it will transform to a rich golden color. You can carefully pour it into a smaller pot at this point and finish boiling inside on your kitchen stove.
Finish Boiling Sap into Maple Syrup:
The sap officially becomes maple syrup when it reaches 7.1˚F above the boiling point of water. This temperature varies depending on your elevation (calculate yours here). Our target temperature is around 218˚F.
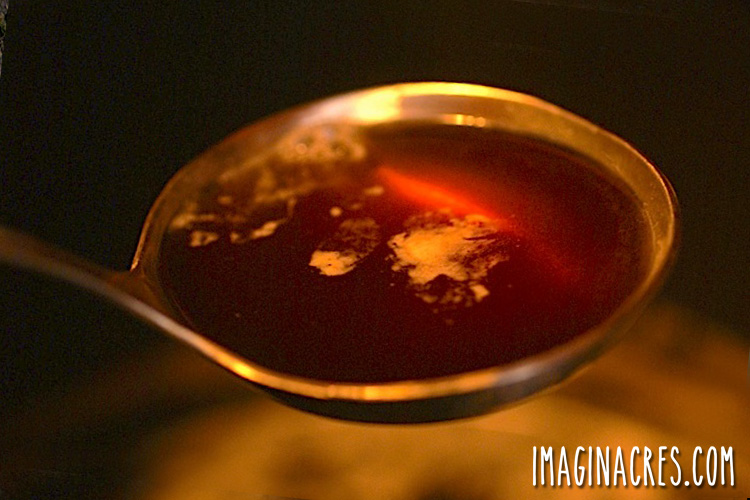
In addition to watching the temperature, I also frequently check the thickness of the syrup using a spoon to see how far we are in the process. When the syrup is ready, it should pour off the spoon in a sheet instead of a stream.

Filter the Maple Syrup:
One thing we learned over the years is that it’s really essential to use maple syrup filters in order to get perfectly clear syrup. Our product the first year was delicious, but we were bummed that we had to throw out he last half inch of every jar because it was full of sugar sand that had slipped through the cracks of our cheesecloth filters.
Now we strain the hot maple syrup twice through the maple syrup filters before bottling or canning.
Be sure to remove the spout at the end of the season so that your maple tree can begin to seal the wound and be ready to tap again next season.
Although the process of homemade maple can take days, the finished product is incredible. It’s beautiful, delicious, homemade, entirely organic, and natural.
Resources and Further Reading:
- How to Identify Maple Trees
- Maple Syrup Quality Control Manual
- How to Tap Maple Trees and Make Maple Syrup
- Storing Maple Syrup
Related Posts


Very interesting…the entire process sounds like fun even if it’s a lot of work…I’d like to order one when you make the next batch next year. Enjoy drinking your liquid ‘gold’…yum yum.
You got it! 🙂
I’m so envious you have large maple trees to tap! What a wonderful experience, especially in the middle of the city. I grew up with a bunch of huge maple trees around our house but here in Montana they’re not native so hard to find. We have a small one on our property but not big enough to tap- someday though!
I didn’t know they didn’t have Maples in Montana! It will be so gratifying on the day when you can finally tap your baby tree. Thanks for stopping in, Annie!
We have a lot of maples in the woods behind our house, we keep meaning to mark them and try our hand at tapping them in the spring. We don’t live in the ideal climate for it, but we’d like to see if we can get some.
You should definitely try Sarah! Even if the climate isn’t perfect, it’s still worth trying, you just never know!
Meredith, I love this post. We had a huge big leaf maple on our acreage in the city and I never thought that it could be tapped. Imagine the wasted years when we could have been enjoying our own maple syrup. All for want of a post like this to show me the way.
Thanks for writing this.
Thanks Chris! The expert at our garden center told us we couldn’t effectively tap our Norway Maple, and I’m so glad we ignored him and did it anyway! Our must have list for our next property definitely includes maple trees, I don’t think I could ever go without them again!
How much syrup do you normally get from how much original unboiled sap? My husband and I are considering tapping our maples this winter but what I have read so far makes the output not seem worth all the effort.
Hi Sarah,
We tapped about 35 gallons of sap this spring and boiled it down to about a gallon of syrup. I say you should try it one year and if it’s not for you, you never have to do it again. I love doing it because maple syrup is incredibly expensive, and the price is always going up, and it’s a lot of fun. It’s amazing to see a free resource flowing out of your trees and be able to turn it into something useful- and it’s hands down the most delicious syrup I’ve ever had! I may be a bit biased though…
Maybe we will give it a shot. Thanks!!
My husband and I had a 500 tap maple operation. Depends on the sugar content. You need instruments to measure this. Plan on 40 gallins of sap to make possibly 1 gallon of syrup. I suggest you look to your local co extension or maple association to learn proper safe methods. This is a food product
I want to try this once, but it is hard to tell when to tap. I live near the Niagara river and Lake Erie, in the city of buffalo. i have three maples to tap. How do i find out when to do this for maximum sap gathering?
Hi Grace! We’re actually right around the corner from you, in Rochester! You want to tap when the nighttime temps are below freezing and the daytime temps are 40 or higher, and preferably on a sunny day. It’s kind of hard to gauge, but we usually tap the trees in March. It’s different every year depending on the weather situation. If you pay close attention to the trees you’ll know when it’s time. Any broken branches will be dripping sap out during the day.
You watch the weather and join maple trader forum.
We live in the city and would like to tap the maples we have in our yard. I am concerned about all the fertilizers/weed killers our neighbors use and wonder if that can affect the syrup.
The roots pull all that up. Unless you have a clean area very bad idea
This is my question. How do you know if the syrup is safe? Especially on a large tree with a large root system.
Blake, Boiling the syrup kills microorganisms. What exactly are you worried about?