Quick Pickling 101: A Beginner’s Guide to Refrigerator Pickles
Want to preserve the flavor of your garden or foraged harvests without the fuss of canning? Quick pickles, also called refrigerator pickles, are the easiest way to capture fresh flavors in a jar with just a handful of ingredients.

If your garden is overflowing or you’ve come back from a foraging walk with more than you can eat fresh, quick pickles are one of the easiest ways to preserve the harvest. No canning gear, no boiling water bath, just fresh veggies, a simple brine, and a few jars in the fridge.
Whether you’re swimming in cucumbers or stumbled upon a patch of wild purslane, quick pickling is a great way to extend the life of fresh produce. No canning equipment, no boiling water bath, just vinegar, salt, and a few spices are all you need.
What Are Refrigerator Pickles?
Refrigerator pickles are vegetables preserved in a simple vinegar-based brine and stored in the fridge instead of being processed in a canner. They’re quick to make, easy to customize, and perfect for small batches.

Why Make Quick Pickles?
Quick pickles are a go-to in my kitchen for a few good reasons:
- Fast and easy: No water bath canning jars and no special equipment. Just pack, pour, and chill.
- Perfect for small harvests: Great for when you have “just a little” of something, like the last carrots in a row or a handful of beans.
- Reduces waste: Extend the life of extra or slightly imperfect veggies.
- Endlessly customizable: Play with herbs, spices, sweeteners, and vinegar types to suit your taste.
They’re also fun to make, especially if you like small kitchen experiments.
Choosing Vinegar for Quick Pickles
Vinegar is the backbone of your brine. It gives pickles their signature tang and helps preserve them safely in the fridge. You can use different kinds of vinegar depending on the flavor you want and what you’re pickling.
Here are the most common options:
- White Vinegar: Has a clear, sharp, and bright flavor and keeps the color of your vegetables vibrant. Great for classic dill pickles, carrots, beans, and onions.
- Apple Cider Vinegar: Tastes mildly fruity and slightly sweet. Adds depth of flavor, especially good with root vegetables like beets or turnips. It may darken light-colored veggies slightly.
- Rice Vinegar: Mild, slightly sweet, and less acidic tasting. Pairs well with ginger, garlic, and delicate greens or herbs. Choose unseasoned rice vinegar (avoid ones with added sugar or salt, unless adjusting your recipe).
- Red or White Wine Vinegar: More complex flavor, with subtle fruitiness. Use in small batches with strong vegetables like onions or peppers. It can affect the color of the finished pickles.
While 5% acidity isn’t required for refrigerator pickles, using a standard vinegar with around 4 to 6% acidity helps your pickles stay fresh and flavorful longer in the fridge. Always check the label, especially on rice vinegar, which can vary. Use food-grade vinegar labeled for culinary use. Cleaning vinegar may look similar, but it’s stronger and not safe for eating.
Add Flavor with Herbs and Spices
You don’t need a lot of extras to make great refrigerator pickles, but this is where the fun begins! Mix and match your favorite flavors to create your perfect batch.
Dried Pickling Spices:
- Black peppercorns
- Dill seeds
- Mustard seeds
- Red pepper flakes
- Celery seeds
- Coriander seeds
- Allspice berries
- Turmeric powder
- Whole cloves
Fresh Aromatics and Herbs:
- Garlic cloves
- Fresh dill (flowers or sprigs)
- Ginger slices
- Chili peppers
- Bay leaves (fresh or dried)
- Fresh herbs like rosemary, basil, or oregano
Try This Combo:
- Garlic + dill seed + mustard seed = classic
- Red pepper + bay leaf + garlic = spicy and bold
- Rice vinegar + ginger + coriander = sweet and tangy
What Can You Pickle?
So many options! Most firm vegetables work well, including:
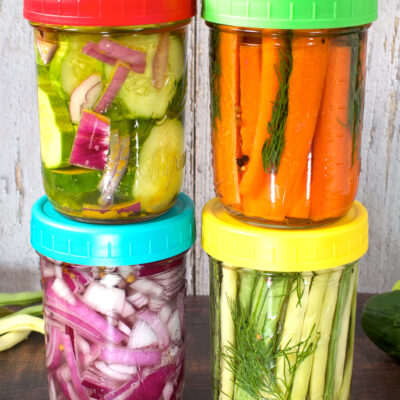
- Cucumbers, spears, chunks, or chips
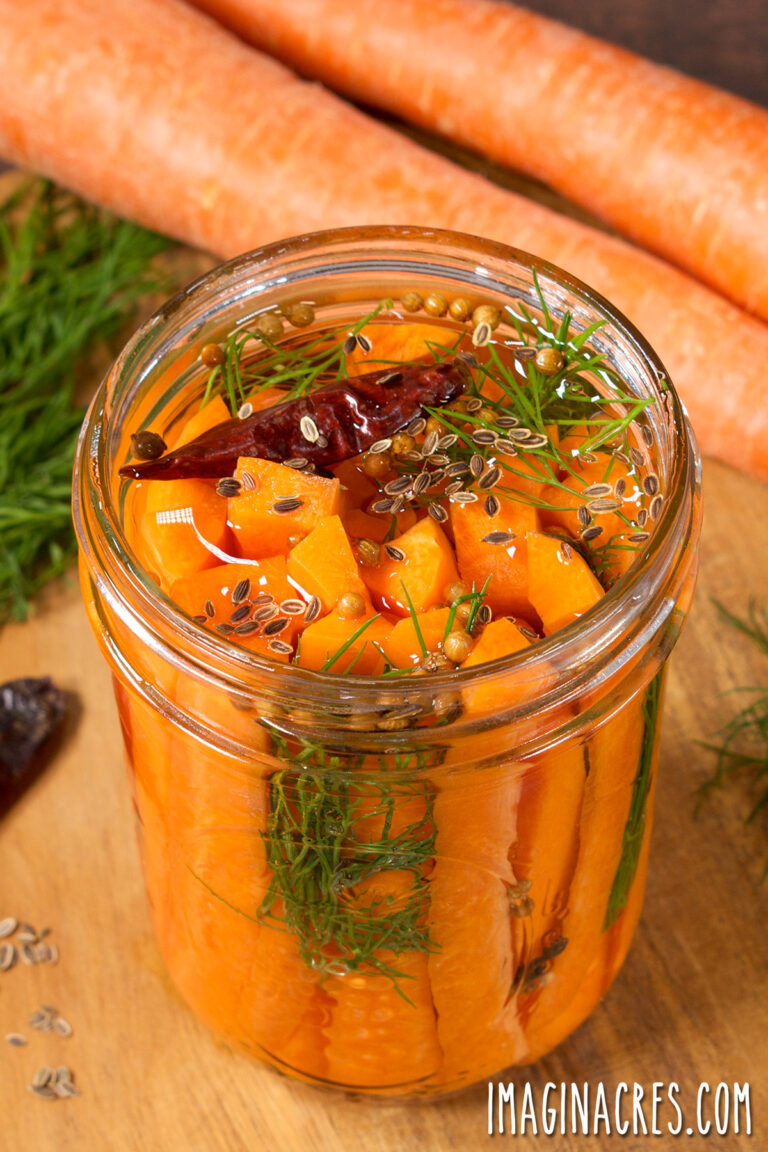
- Carrots, sticks or slices
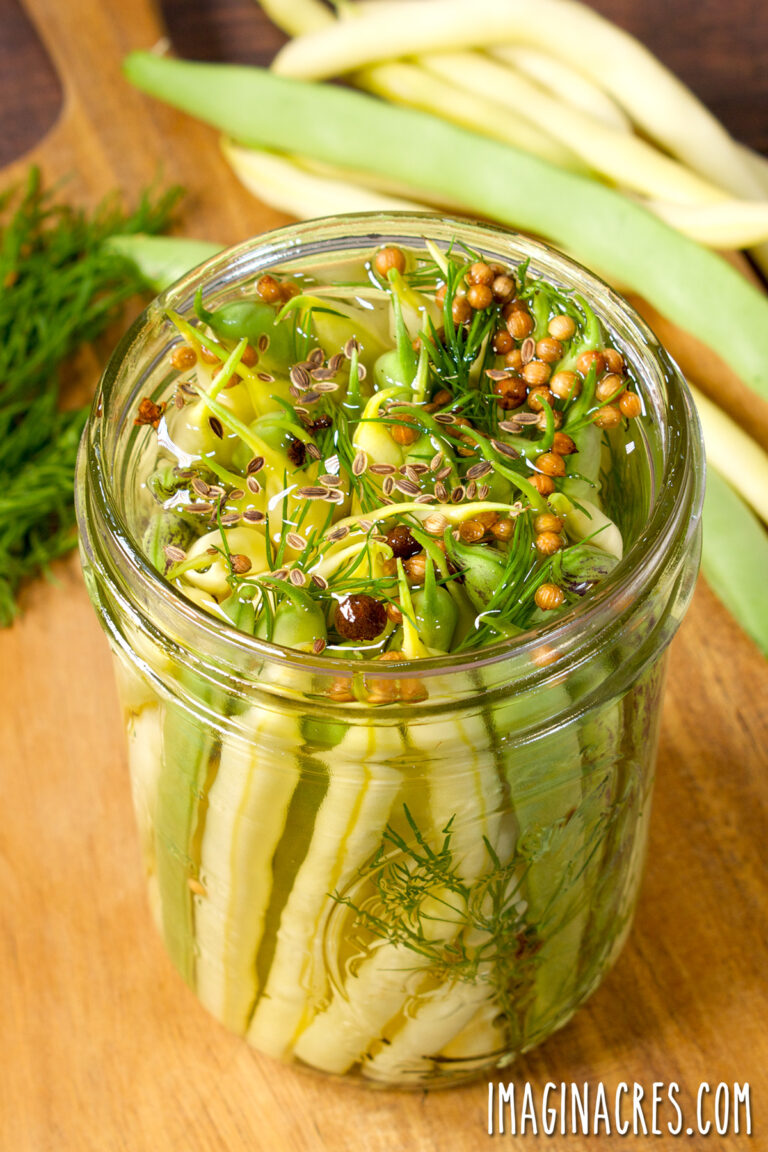
- Green beans
- Onions, pearl or sliced
- Radishes
- Peppers
- Cauliflower
- Beets
- Jalapeños
You can also quick pickle foraged finds like:
- Garlic scapes
- Ramps
- Purslane
- Fiddleheads
How to Make Fridge Pickles (Step-by-Step)
This is my simple, go-to brine recipe. It’s mild, balanced, and works well for almost any vegetable. It makes about 4 cups of brine. Enough to fill 2 quart or 4 pint jars packed with vegetables. Scale up or down as needed.
Kitchen Equipment You’ll Need
You likely already have everything you need:
- Clean glass jars with lids (Mason jars, repurposed food jars, or clamp-top jars)
- A saucepan to heat the brine
- Knife and cutting board
Basic Quick Pickle Brine
Ingredients:
- 2 cups vinegar (white, apple cider, rice, or wine)
- 2 cups water
- 2 tablespoons pickling salt or kosher salt
- Optional: 2 tablespoons sugar for a slightly sweet brine
- 1 to 2 teaspoons pickling spices of choice
Instructions:
- Wash your jars and lids well with hot soapy water. Rinse well and set aside.
- Prep the produce: Wash well and trim, slice, or chop as needed.
- Blanching firm vegetables (optional): Most quick pickles are enjoyed crisp, but some firm vegetables, such as beets, carrots, and green beans, benefit from a quick blanch before pickling. Blanching softens the texture slightly and helps the vegetables absorb flavors more quickly. To blanch: Bring a medium pot of water to a boil and fill a large bowl with ice water. Add the vegetables, return to a boil, and cook for 2 minutes (cook beets for 5 minutes), then drain.
- Make the brine: Combine vinegar, water, salt, and optional sugar in a saucepan. Warm over medium heat until the salt and sugar dissolve (no need to boil), then remove from heat and let cool slightly.
- Pack the jars: While the brine cools, pack your jars firmly with the prepared vegetables, herbs, and spices.
- Pour the brine: Carefully pour the warm (not boiling) brine over the vegetables, covering them completely. Leave about 1/2 inch of headspace between the brine and the top of the jar.
- Cool and refrigerate: Cover the jars and let them cool on the counter to room temperature for about one hour, then move them to the fridge.
- Wait 24 to 48 hours: The flavor improves after a day or two. Some tender veggies (like cucumbers or onions) are ready in just a few hours.
Storage and Shelf Life
Since these pickles are not processed in a canner, they must be stored in the refrigerator. They’re best eaten fresh and won’t last forever. Be sure to use them within 3 months for the best quality.
- Most quick pickles are best within 2 to 4 weeks so they can develop flavor.
- Always use a clean utensil to serve, no fingers!
- Discard if the brine becomes cloudy, slimy, smells off, or shows signs of mold.

A Simple Start to Preserving the Harvest
Quick pickles are one of the easiest ways to preserve extra veggies from the garden, farmers’ market, or wild foraging. They’re crisp, flavorful, and endlessly adaptable.
Next time you find yourself with a surplus of something tasty, give this method a try. It just might become one of your favorite ways to make homemade pickles.
Ready to start pickling? Try one of these easy recipes. Each one uses simple ingredients and delivers big flavor:
- Easy Refrigerator Dill Pickles
- Bread and Butter Refrigerator Pickles
- Refrigerator Dilly Beans
- Pickled Carrots with Dill and Garlic
- Quick Pickled Red Onions
- Refrigerator Dill Zucchini Pickles
- Bread and Butter Zucchini Pickles
Basic Quick Pickle Brine
Ingredients
- Fresh vegetables of your choice
- 2 cups vinegar
- 2 cups water
- 2 tablespoons pickling salt or kosher salt
- 2 tablespoons sugar optional, for a touch of sweetness
- 1 teaspoon pickling spices of choice optional for flavor
Instructions
- Prepare the vegetables: Rinse thoroughly, then trim, slice, or cut into desired shapes.
- Heat the brine: In a medium saucepan, combine vinegar, water, salt, and sugar (if using). Warm over medium heat, stirring occasionally, until the salt (and sugar) fully dissolve. Remove from heat.
- Fill the jars: Add your prepared vegetables along with any herbs or spices you like to clean jars, packing them in snugly.
- Add the brine: Pour the warm (not boiling) brine over the vegetables, covering them completely.
- Cool and chill: Cover the jars, let them cool at room temperature for about 1 hour, then transfer to the refrigerator.
- Wait and enjoy: Most vegetables benefit from resting in the brine for 24–48 hours for best flavor, though some, like cucumbers or onions, can be enjoyed within a few hours.
- Yield: About 4 cups of brine, enough for 2 quart or 4 pint jars packed with vegetables. Adjust quantities as needed.
Notes
- Bring a medium pot of water to a boil and fill a large bowl with ice water.
- Add the vegetables, return to a boil, and cook for 2 minutes (cook beets for 5 minutes), then drain.
Nutrition