How to Hatch Eggs with a Broody Hen
Learn how to hatch eggs naturally with a broody hen. Get tips for choosing fertile eggs, setting up a safe brooding area, caring for your hen, and raising chicks.
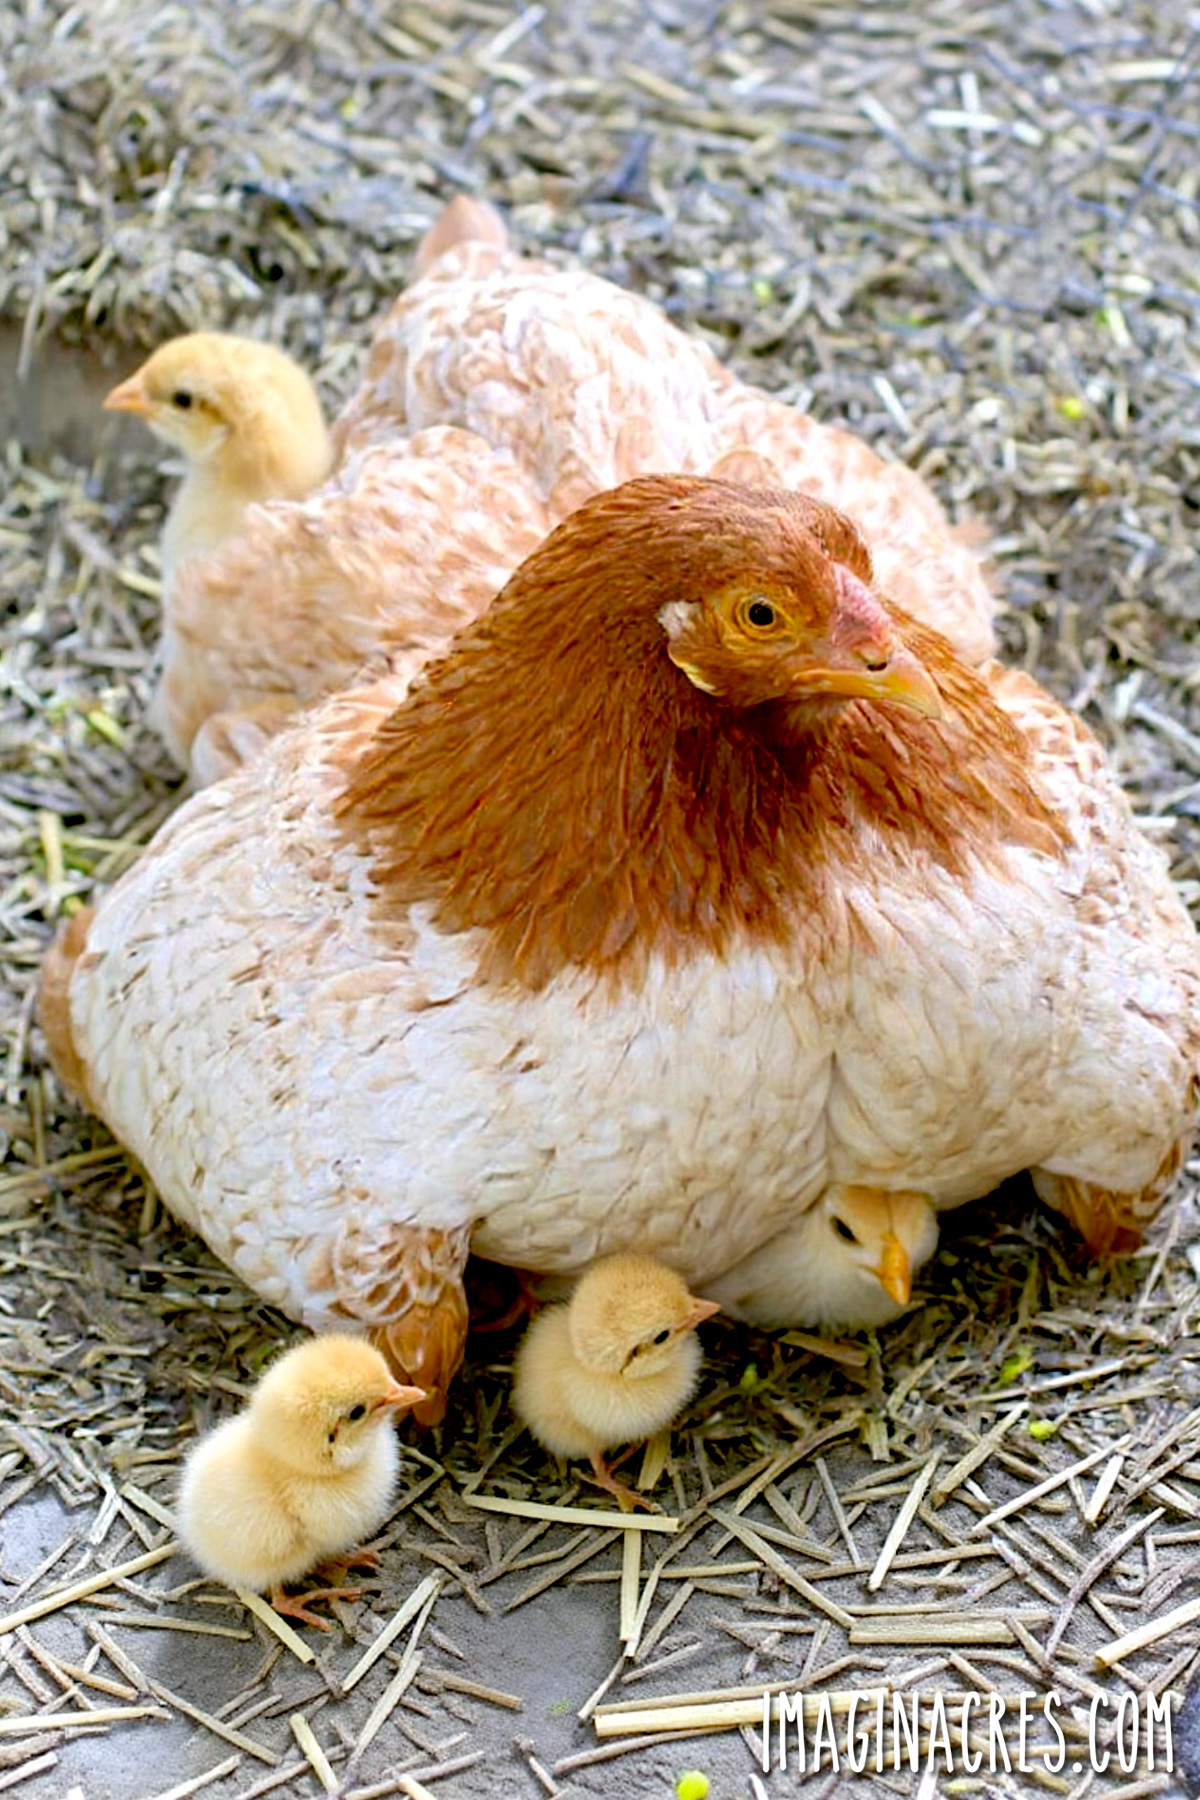
Hatching eggs with a broody hen is one of the most magical parts of keeping backyard chickens.
When a hen decides she’s ready for motherhood, she settles into the nest with a level of focus and determination that puts even the best incubators to shame. She handles the temperature, humidity, and egg-turning. Once the chicks arrive, she handles all the care and teaching. All you really have to do is give her a safe place and the right eggs, and she’ll take it from there.
But even though a broody hen knows exactly what she’s doing, she can still use a little help from us humans. A few simple steps can make the difference between a stressful hatch and a calm, successful one. Over the years, I’ve tried it both ways: leaving a broody in the coop with the flock, and setting her up in her own little brooding space, and I’ve learned a lot about what works (and what definitely doesn’t).
If you have a broody hen and you want to hatch chicks naturally, this guide will take you through the entire process. You’ll learn how to identify true broodiness, prepare the nesting area, source fertile eggs, encourage successful incubation, and care for both the mother hen and her chicks once they hatch.
With some planning and your support, your broody hen can raise a healthy and happy brood of chicks, allowing you to enjoy one of the most delightful aspects of chicken keeping.
What Is a Broody Hen?
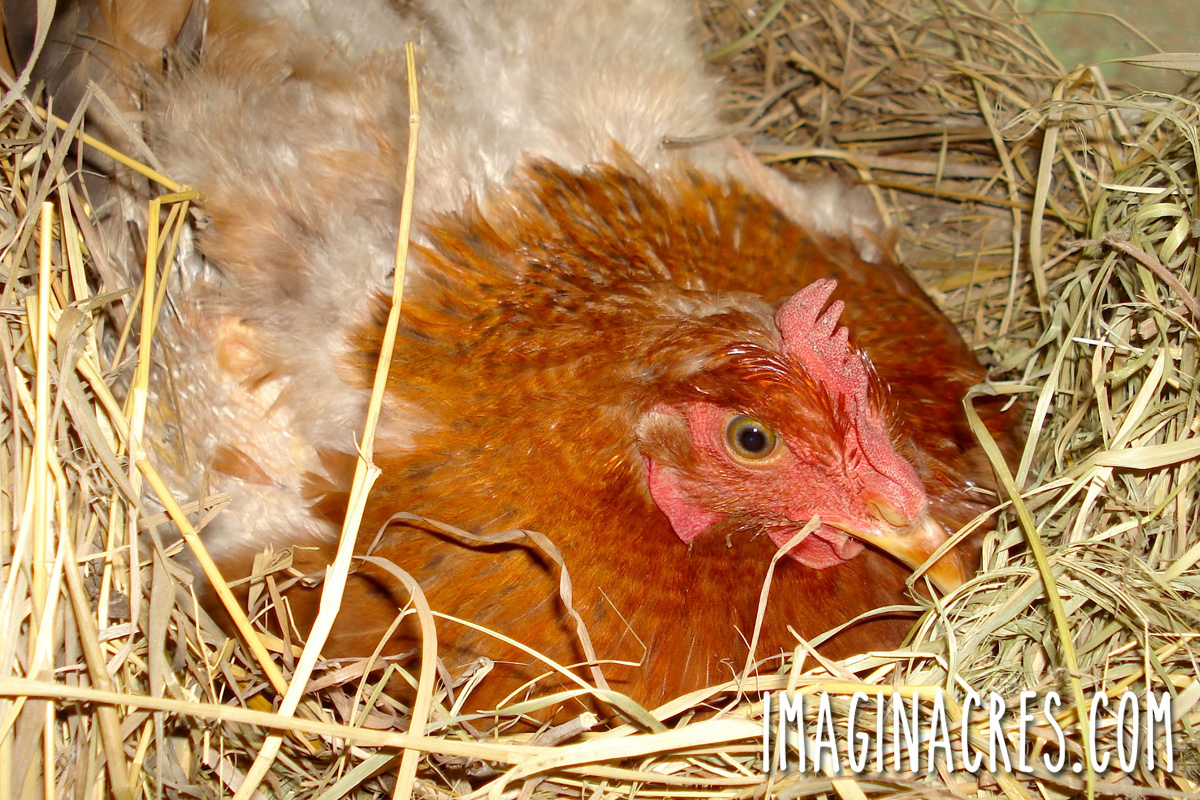
A hen goes “broody” when her instinct switches from laying eggs to hatching them. Instead of hopping off the nest after she lays an egg, she settles in like she’s glued there, all fluffed up, determined, and ready to commit the next three weeks of her life to incubating a clutch of eggs.
A truly broody hen spends nearly all her time on the nest, only getting up once or twice a day to grab a quick bite, drink, and take the world’s fastest dust bath. As her hormones shift, her body temperature rises slightly, she stops laying, and her whole demeanor changes. Even the sweetest hens can transform into feathered dragons when they’re broody: puffing up, growling, or giving you a sharp peck if you reach into the nest.
These behaviors aren’t bad; they’re all part of her natural drive to protect her future chicks. But it’s important to be sure she’s genuinely broody before you give her fertile eggs to hatch.
You can find the full list of signs (with photos and tips) here: How to Deal with a Broody Hen.
Should You Let a Broody Hen Hatch Eggs?
When a hen goes broody, you suddenly have a choice to make: Do you let her hatch eggs, or gently discourage her and move on?
Watching a broody raise chicks is one of the most rewarding experiences in the coop. A dedicated broody hen is nature’s built-in incubator and childcare provider. She keeps the eggs perfectly warm, turns them throughout the day, and even chats with her chicks while they’re still inside the shells. Once they hatch, she becomes a full-time mama, teaching them how to scratch, eat, drink, and stay safe.
But despite all the benefits, letting a broody hen hatch eggs isn’t always the right decision. Here are a few things to consider before you commit:
Pros of Hatching With a Broody Hen:
- Less work for you: No incubators, no thermometers, and no turning eggs. She handles it all.
- Higher success rates: A healthy, committed broody often outperforms even the best technology.
- Natural chick raising: Chicks learn real flock behavior from day one.
- Stronger birds: Naturally brooded chicks tend to be hardy and well-socialized.
- It’s heart-melting: There’s nothing sweeter than a mama hen calling her chicks.
Potential Challenges and Disadvantages:
- Timing matters: A hen might go broody when you weren’t planning on raising chicks.
- Space requirements: She needs a safe, separate brooding area (more on that soon).
- Egg sourcing: You’ll need fertile eggs from your flock or elsewhere.
- Flock dynamics: Other hens may bother her or her chicks if left in the main coop.
- Inconsistency: Not all broodies stay committed to the full incubation period.
When You Should Let Her Hatch Eggs:
- You want to grow your flock naturally.
- She’s healthy, reliably broody, and has a calm temperament.
- You have a safe space for her to brood and raise chicks.
- You can source good, fertile eggs.
- You’re ready to support her if something goes wrong.
When You Shouldn’t Let Her Hatch Eggs (At Least Not Now):
- You don’t want more chickens right now.
- You don’t have a separate, secure brooding setup.
- She’s broody for the first time and seems inconsistent.
- It’s the dead of winter or extremely hot weather.
- You’re dealing with flock illness or stress.
Helping a Broody Hen Hatch Eggs Naturally
Once you’ve decided to let your broody hen hatch a clutch, your role shifts from observer to support crew. She’ll do most of the hard work, but a little preparation on your part can make her job easier and increase the chances of a successful hatch.
These next steps walk you through how to help a broody hen hatch eggs and raise chicks successfully:
Step 1: Source Good Fertile Eggs
A hen that goes broody has a deep craving to sit on eggs and hatch babies. It doesn’t matter if they are her eggs, eggs from her flock mates, or even a clutch of ceramic fakes. If it looks like an egg, she’ll sit on it. That means it’s up to you to give her healthy, fertile eggs that have the best chance of developing into strong chicks.
Where to Get Fertile Eggs
If you have a rooster, many of your flock’s eggs will already be fertile. Simply collect a set laid within the last week and choose the cleanest, best-shaped ones for hatching.
No rooster? No problem. You can source fertile hatching eggs from:
- A local farmer or friend with a rooster.
- A 4-H or poultry club.
- A reputable hatchery that ships hatching eggs.
- Local breeders often sell fertile eggs in the spring.
Shipped eggs often experience bumps and shakes along the way, so it’s normal for a few not to develop. Order a few extras to account for possible duds.
How Many Eggs Should You Give Her?
Most full-size laying hens can comfortably cover 8-12 standard eggs, while bantams can cover 3-6 eggs, depending on their size and breed. The important part is that she can fully cover the entire clutch when settled on the nest. Any eggs sticking out from under her won’t stay warm enough to develop properly.
Be sure to account for duds that are unfertilized, damaged in transit, or have other developmental issues.
While You Gather the Eggs
Don’t worry if it takes some time to gather the fertilized eggs. Just keep your broody hen happy by placing a few eggs, or even fake eggs, under her until the eggs arrive. This is a good way to test her broodiness. If she is truly broody, she’ll be happy to incubate the temporary eggs for a while.
Storing Fertile Eggs
If you’re gathering eggs over several days before giving them to your broody hen, store them pointy end down in a clean carton at 50–60°F (a cool room or basement works well). Avoid refrigerating them, and don’t wash the eggs; the natural bloom protects them from bacteria. Gently tilt the carton once or twice a day to keep the yolks centered. Fertile eggs stored under good conditions typically hatch well for up to 7 days, though fresher eggs are always better.
Step 2: Choose a Safe Brooding Environment
When a hen goes broody, it is natural for her to separate from the flock and go off by herself. Her goal is to find a safe area to lay and incubate eggs. Once she finds a spot, she will lay one egg almost daily until she has a clutch of about a dozen eggs. Then she stops laying eggs and sits on them for about 21 days until the chicks hatch.
When the flock is confined to a coop and pen, you will likely discover your hen is broody when she chooses one of the nesting boxes to settle into. If you allow the broody hen and eggs to remain in her chosen nesting box, she will be able to interact with the rest of the flock, but they might bother her. Plus, there is a danger of trampling eggs or even hens attacking the chicks when they hatch.
The first time we let a broody hen hatch chicks, we allowed her to remain in the coop in a closed-off corner. She and the rest of the flock could still see and hear each other, but she and her eggs were safe from being disturbed.
All was fine while the broody hen sat on her nest, incubating the eggs. Things were still ok after hatching, and while the chicks explored their little corner, staying close to mom. However, when it was time for Mom to lead her chicks out into the world, it became very stressful for everyone. There was only one door out of the coop and one pen for all to share. The flock was curious, and Mom was very protective. Feathers flew.
Since then, I’ve found it far easier (and much calmer for everyone) to give a broody hen her own dedicated brooding area. A small, safe space allows her to incubate in peace and raise her chicks without flock drama.
This doesn’t need to be fancy. Just secure, quiet, and separate enough that she and her future chicks can settle in without interruptions. In the next step, we’ll look at simple ways to create a brooding setup that works for both you and your hen.
Step 3: Set Up a Dedicated Brooding Area
A brooding coop doesn’t need to be elaborate. What your hen truly wants is a quiet, sheltered, predator-proof space where she can sit on her eggs without interruptions. Your job is simply to create a setup that keeps her safe, comfortable, and close to food and water.
A small 3×3 foot area is usually plenty. The key is keeping it cozy, secure, and easy for you to access.
A brooding area should be big enough for:
- A roomy nest filled with clean bedding
- A small feeder
- A waterer
- Space for mama to stand, stretch, and poop away from the nest
Once the chicks hatch, your broody hen will also need access to a secure pen, so she can show them the world and teach them the art of chickendom.
Option 1: Divide a Larger Coop
If you have a large coop, it may be as simple as dividing it to allow the broody hen and her chicks to live close to the flock while remaining protected from the flock. Use sturdy wire or wood to partition off a corner so she can incubate without interference from the flock. This setup lets the flock stay familiar with her and the chicks while still keeping everyone safely separated.
You may need to cut a small, separate exit door and attach a secure pen so mama and her chicks can explore outside without mixing with the rest of the flock too soon.
Option 2: Build a Small Mini Coop
We use a simple 4×4 coop as our brooding house, grow-out coop, and occasional sick bay. It’s nothing fancy, but it’s perfect for a broody hen. It connects to a small, attached run where the chicks are safe from predators and can learn to scratch, dust bathe, and explore while staying safely contained until they are ready to rejoin the flock.
Option 3: Buy a Prefab Coop
Those cute little prefab coops you see at farm stores are often too small for a full flock, but they’re just right for a broody hen and her chicks. If you use one, reinforce it with:
- Hardware cloth instead of chicken wire.
- Secure latches on doors and nesting boxes.
- Extra screws or staples to close gaps.
Think of it as giving your broody a starter home with a few safety upgrades.

Prep the Area Before Moving Her
Whatever you choose for the brooding coop, prepare it ahead of time by providing a nesting box filled with clean bedding, fresh water, and food. Place the food a little way away from the nest to encourage the broody hen to get up, stretch, poop, eat, and drink before returning to the nest to continue incubating the eggs.
Step 4: Move the Broody Hen to Her New Nest
Moving a broody hen can feel a little like defusing a tiny feathery bomb. She’s determined, hormonal, and not thrilled about changes to her setup. But with the right timing and a gentle approach, you can move her without breaking her broodiness.
Move Her at Night for the Best Success
The easiest time to relocate a broody hen is after dark, when she’s naturally calmer and less likely to panic or run back to her original nest. Gently lift her from the box, keeping her close to your body so she feels secure, and carry her to the prepared brooding area.
If she is sitting on eggs, move the eggs to the brooding area nest as well. Carefully check under her wings before moving her to be sure she doesn’t have eggs tucked up under there. Move the eggs first, then set her down near them, not on them. You don’t want her to freak out and accidentally break the eggs.
Expect a Little Restlessness
Moving a broody hen can be stressful. Try not to bother her too often the following day. She may be restless for a day or two after the move. Let her continue with her original eggs and wait to add any new fertile eggs until she has fully calmed down.
If She Went Broody Without Eggs
Some hens go broody even when there’s nothing in the nest. In this case, move her to the new brooding area and place a few fake dummy eggs or clean, infertile eggs under her. Give her about a week to prove her commitment. If she stays put consistently, it’s a safe bet that she is still broody and will sit on the eggs long enough to hatch them.
What If She Refuses the New Nest?
She might refuse to sit on the eggs after the move. If you have fertilized eggs that you want her to hatch, it is a good idea to have an incubator ready just in case her broodiness breaks.
Most broodies, however, adapt just fine with a little patience and a peaceful environment.
Step 5: Add Fertilized Eggs
Once your broody hen has settled into her new space, it’s time to give her the real eggs she’ll be hatching. This step is simple, but timing matters.
Mark the Eggs for Easy Tracking
Use a plain pencil to lightly number or mark each egg. This helps you keep track of:
- Which eggs you added.
- Which ones she may accidentally kick out.
- Development progress during candling.
Avoid using markers or pens; a pencil is the safest choice.
Add the Eggs When She’s Calm
The best time to slip the fertilized eggs under your broody is after dark or during one of her quick daily breaks to eat and drink. She’ll be more relaxed, less reactive, and far more likely to accept the eggs without fuss.
If you’ve been using fake eggs or test eggs, remove them first, then carefully place the fertilized eggs into the nest. A broody hen will treat them as her own and immediately tuck them under her breast with her beak.
Let Her Take Over From Here
Once the eggs are in place, your broody hen will instinctively arrange and rotate them, creating the perfect microclimate for incubation. Your main job now is to support her without disturbing her too often.
Step 6: Caring for a Broody Hen During Incubation
Once your broody hen has settled on her clutch, she’ll handle almost everything. Her body maintains the perfect temperature and humidity; she turns the eggs throughout the day; and she rarely leaves the nest except for a lightning-fast break to eat, drink, and poop. Still, she relies on you to keep her environment clean, safe, and well-stocked.
Feed a High-Protein Diet
Switch her from layer feed to 18–20% protein chick starter feed during incubation. Here’s why:
- Broodies stop laying eggs and don’t need extra calcium.
- The higher protein helps maintain her condition during this demanding period.
- The same feed will be perfect for her chicks once they hatch.
Keep a small feeder nearby, but not so close that spilled bedding ends up in her food.
Fresh Water Every Day
A broody hen doesn’t drink much, but clean water is essential. Replace it daily and keep the waterer scrubbed and free from shavings.
Encourage Daily Breaks
Most broodies instinctively take one quick break per day to eat, drink, stretch, dust bathe, and produce one enormous broody poop (you’ll know it when you see it!).
Some broody hens are so dedicated to their task that they will not leave the nest. If you have one of these committed hens, gently pick her up off the nest and place her in front of the food and waterer. She’ll usually take the hint and return to the nest on her own when she’s ready.
Keep the Brooding Area Clean
Use her daily break as your window to tidy up:
- Remove broody poops.
- Replace damp or soiled bedding.
- Check for cracked or foul-smelling eggs and remove them immediately.
A clean, dry nest reduces the risk of bacteria that can harm developing chicks.
Candling the Eggs
During the few minutes she is off the nest is a good time to candle the eggs. You only need to candle once, around day 7, to confirm development. Use a candler or a bright flashlight in a dark room to look for veins, a developing embryo, and movement (optional at this stage).
Clear eggs, blood rings, or foul odors indicate the egg isn’t viable and should be removed. Learn more: How to Candle Eggs.
Usually, a broody hen knows which eggs, if any, are bad and will kick them out of the nest herself. However, removing the bad egg is just another way you can help a broody hen hatch eggs.
Step 7: Prepare for Hatch Day
As day 21 approaches, your broody hen shifts into full mama mode. She’ll become even more focused on the nest, adjusting her body to maintain perfect temperature and humidity while listening to the faint peeps coming from inside the eggs. This is the stage where your job is mainly to step back and let nature handle the final stretch.
Do a Final Check Around Day 17
A few days before hatch, give the brooding area one last tidy without disturbing the nest itself:
- Top off the feeder with chick starter.
- Clean and refill the waterer.
- Add marbles or small stones to the base of the chick waterer to prevent drowning.
- Remove any loose bedding that could trap or tangle a newly hatched chick.
- Say your good-byes to Mama Hen, and then let nature take its course.
After this point, avoid making changes that could stress your hen.
Curious what a broody hen hatch actually looks like in real life including the waiting, the worry, and the surprises? Read our story about Little Carl and her surprise hatch.
Keep Things Peaceful and Quiet
Broodies are sensitive during the final days. Bright lights, sudden noises, or frequent peeking can cause unnecessary stress. Resist the urge to fuss. She knows exactly what she’s doing.
She will position the eggs and adjust her body over the nest to regulate temperature and humidity for an optimal hatch. She will listen and talk with her peeps while they are inside the eggs, and as they hatch.
If you want to keep an eye on her progress without disturbing her, a small WiFi camera works wonders. It’s incredibly reassuring to peek in at her from the house and see her content and settled.
Understanding the Hatching Process
Hatching can take up to 48 hours or more, and it starts long before you see the first chick. What’s happening under your broody:
- Chicks begin cheeping from inside the shells.
- Mama hen responds with soft clucks.
- She adjusts her posture and humidity with each new pip.
- Chicks hatch at different times and dry off underneath her.
Mama hen will not leave the nest during this time. Instead, she will continue to focus on hatching her eggs and keeping her chicks warm.
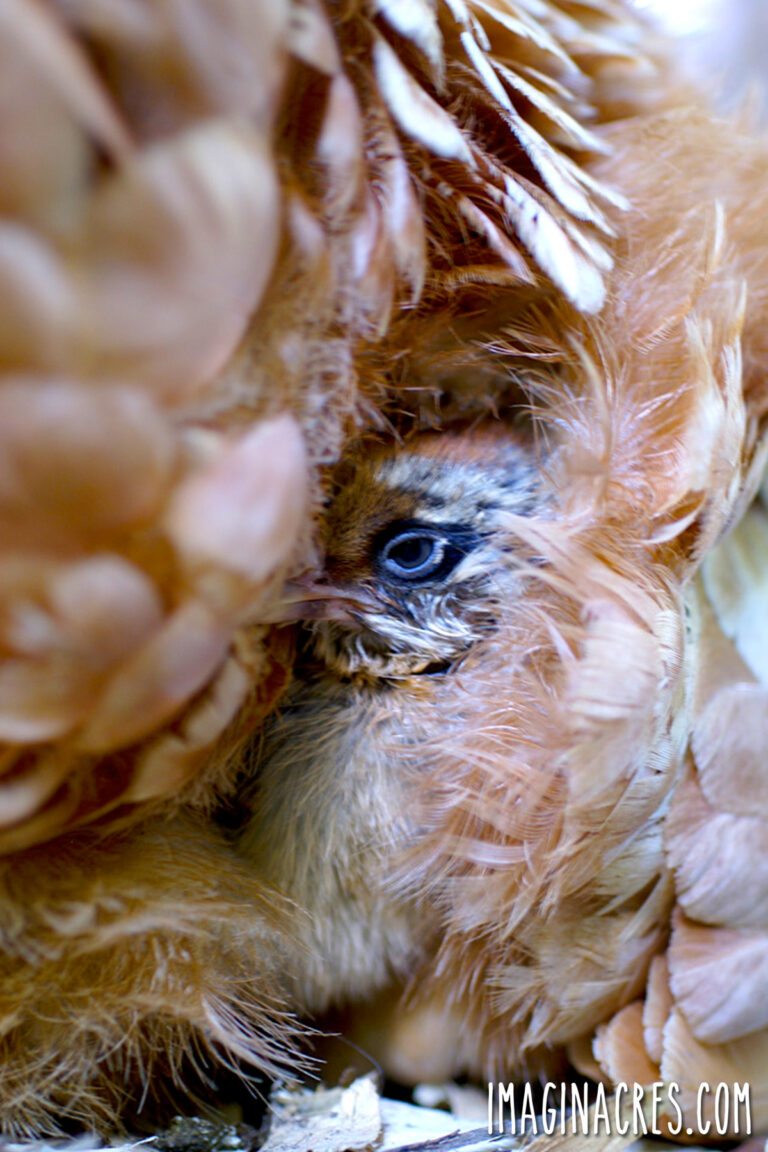
The chicks will hatch and dry out under your broody hen over several days. The only way you will know when this is happening is when you see a chick peeking out from under her or see eggshells outside the nest. The hen will remain on the nest for days, or until all the chicks have hatched and dried out.
Let Mama Decide When the Hatch Is Done
Once she feels all viable chicks have hatched and dried, she will:
- Rise from the nest.
- Gently call her chicks.
- Lead them to the waterer and feeder for the first time.
Once the broody has left the nest with her chicks, it is unlikely she will return to sitting duties. If there are eggs left in the nest, they are probably not viable. If your eggs didn’t hatch as expected, see my troubleshooting guide here.
Wait a little while to see if the hen returns to the nest to continue incubation. If it is clear she has finished, remove the nest and replace it with clean bedding.
Rare but Possible: Early Abandonment
Occasionally, a hen may abandon her chicks right after hatching. It’s uncommon, but it’s wise to have a brooder set up and warm just in case you need to gather the chicks and care for them yourself. Learn more: How to Prepare for Baby Chicks.
Step 8: Caring for Mama Hen and Her Chicks
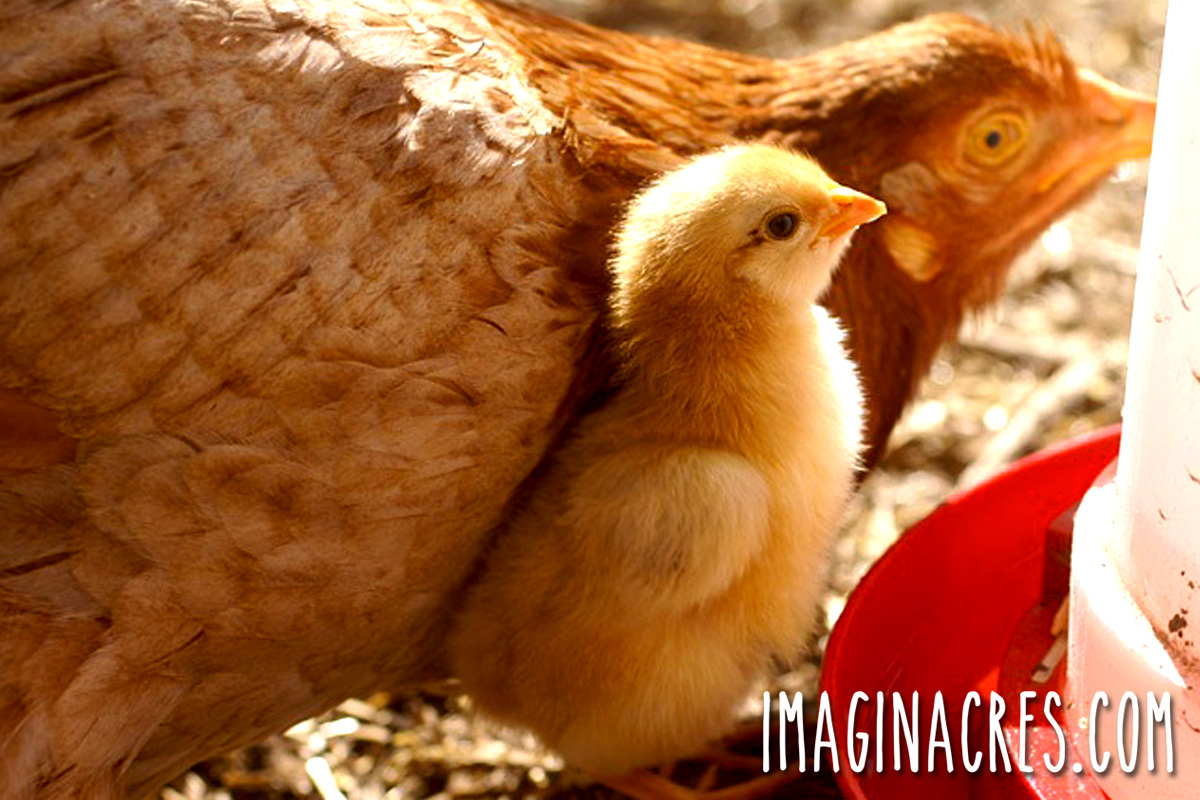
Once the chicks have hatched, your broody hen shifts instantly into full-time motherhood. She’ll puff herself up like a feathery shield, cluck softly to her babies, and guide them through everything they need to learn in their first weeks of life. Your job from here is simple: keep their space clean, safe, and well-stocked, and let mama do the rest.
Provide Clean Food and Water
Keep chick starter feed available at all times. The chicks need the high protein to grow, and mama will happily eat it too. Expect to clean the feeder and waterer often. Tiny chicks are surprisingly good at kicking shavings or straw into their dishes. Replace wet or soiled bedding as needed to keep their space dry and sanitary.
What to Expect in the First Two Weeks
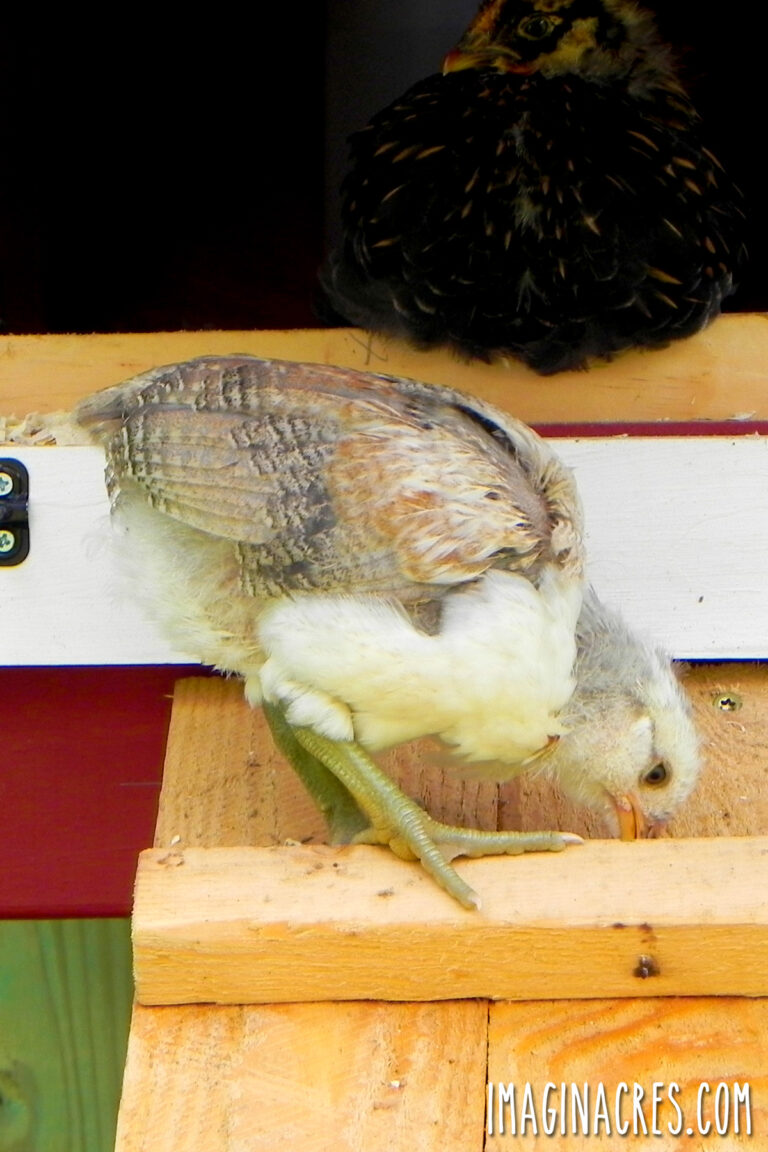
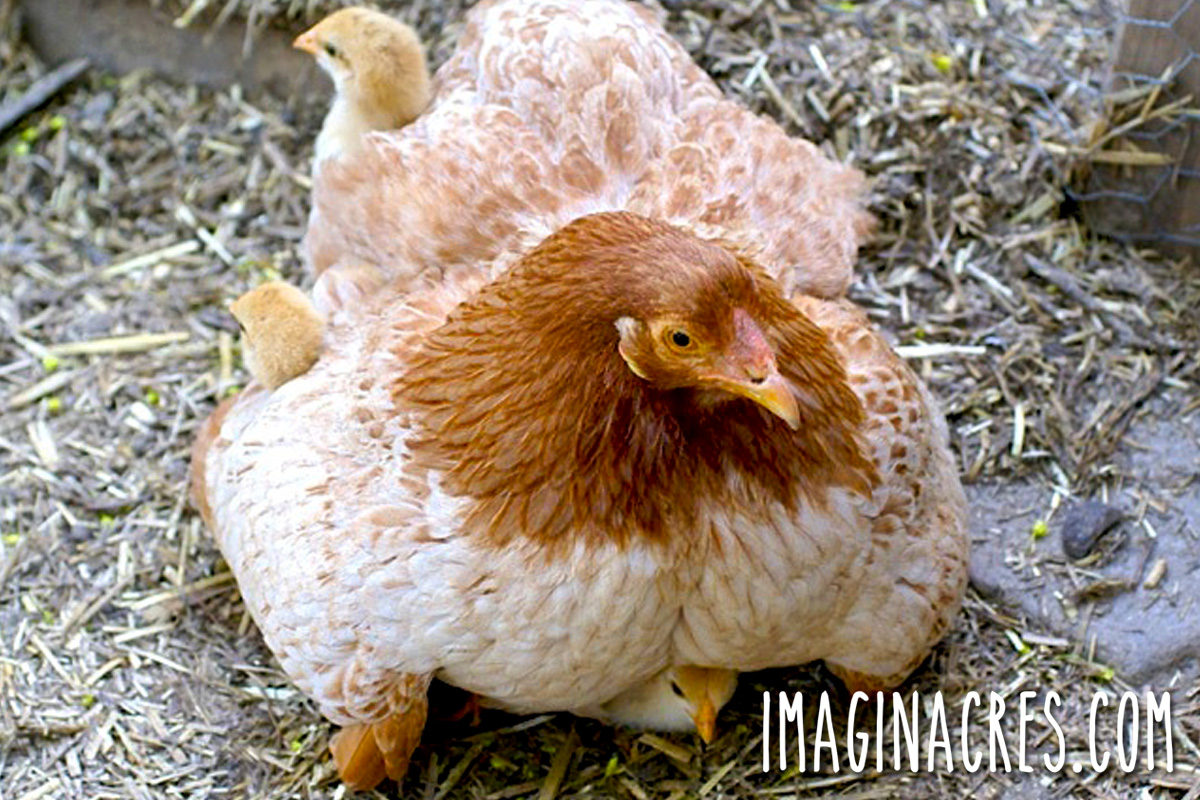
For the first few days, the chicks spend most of their time tucked under mama, venturing out only to eat, drink, and explore for a minute or two before scurrying back under her wings.
Around two weeks of age, you’ll see them:
- Exploring the pen more boldly.
- Trying out tiny dust baths.
- Pecking and scratching right alongside their mother.
They’ll continue to return to her for warmth, comfort, and bedtime snuggles.
Outdoor Time (Weather Permitting)
If the weather is warm and you have a secure run, open the door and let your broody stretch her legs. She may take a quick break alone, or she may decide to bring her chicks outside when she feels they’re ready. Fresh air and sunshine are wonderful for both hen and chicks.
Reintroducing Mama and Chicks to the Flock
One of the biggest perks of broody-raised chicks is how smoothly they integrate back into the flock, often much earlier than brooder-raised babies. Because Mama hen is running the show, reintroduction tends to be surprisingly easy.
Start by allowing the flock to free-range around the broody pen so everyone can see each other through the wire. This builds familiarity without risk.
After a few weeks, and once mama and her chicks have bonded well, you can let the broody hen rejoin the flock with her chicks. Expect a little squabbling as she reclaims her place in the pecking order, but trust her, she knows how to handle herself and protect her babies.
When Chicks Join the Flock
Many broodies integrate their chicks earlier than you’d expect. Some march their babies straight into the main coop at just a few weeks old and dare anyone to challenge them. Others prefer a slower approach, letting the flock get accustomed through a fence before making the big move.
Both methods work, and the timing really comes down to:
- Your broody’s confidence.
- The temperament of your flock.
- The safety of your coop and run.
A good rule of thumb is to let mama set the pace. Broody hens are incredibly effective at teaching chicks how to navigate flock politics and stay safe. With her guidance, integration often happens naturally without the drama that can come with brooder-raised chicks.

When Chicks No Longer Need Mama
By the time the chicks reach 5–6 weeks old, they’re usually fully feathered and no longer need warmth from their mother. Around this stage, your broody hen may decide she’s officially off duty.
Some hens slip back into flock life overnight without a backward glance, while others linger nearby and keep an eye on their chicks a bit longer. Both behaviors are perfectly normal.
If the mother hen chooses to rejoin the flock before her chicks do, don’t panic. As long as nighttime temperatures stay above 50°F, the chicks can remain safely in the brooding coop on their own. On cooler nights, you may need to provide a little supplemental heat until they’re fully feathered and robust.
No matter how your broody handles the transition, her chicks will continue to grow more independent each day. They’ll begin to explore confidently, establish their own tiny pecking order, and eventually blend into the flock right alongside the older birds.
Hatching Eggs with a Broody Hen FAQs
Even with a dedicated broody hen, questions always pop up, especially if this is your first time letting a hen hatch eggs. The following FAQs cover the most common concerns backyard chicken keepers have during the brooding and hatching process:
How long can a broody hen leave her eggs? Most broody hens take one quick break per day, usually 10-20 minutes. This is perfectly normal and won’t harm the eggs. If she’s off the nest for more than an hour, especially in cool weather, gently encourage her back or check for disturbances that may have startled her.
Should I help a chick hatch? No. As tempting as it is, helping a chick hatch can cause serious injury or death. A chick that can’t complete the hatch process on its own often has underlying health issues. Let mama hen decide what’s best. She’ll guide viable chicks through the process.
Can I move a broody hen once she’s sitting? Yes, but timing and technique matter. Move her after dark, keep her eggs warm, and place her in a prepared nest so she settles quickly. Some hens adapt immediately; others may reject the new spot. If you need reliable results, always have a backup plan (like an incubator) just in case her broodiness breaks.
Is it normal for a broody hen to stop eating so much? Absolutely. Broodies naturally eat and drink less while incubating eggs. As long as she gets up once a day and has access to clean water and high-protein feed, she’s fine. If she refuses to get up at all, gently lift her off for a short break.
What if my broody hen abandons her chicks? It’s rare, but it can happen, especially with first-time broodies. Always have a brooder setup ready just in case. If she abandons only the eggs after some chicks hatch, this is normal; she prioritizes caring for the live chicks.
Can I give a broody hen more eggs after she starts sitting? It’s best not to. Adding eggs later results in a staggered hatch, and the mama hen will eventually leave late eggs behind to care for the earlier chicks. For the best outcome, give her all the fertile eggs at the same time.
Will a broody hen protect her chicks from the flock? Most broody hens are excellent protectors and will not hesitate to defend their babies. This is why broody-raised chicks often integrate far earlier than brooder-raised chicks. Still, supervise early interactions and allow mama hen to set the pace.
How soon can chicks start exploring outside? If the weather is warm and the run is predator-proof, chicks can go outside with mama as early as a few days old. She’ll decide when they’re ready and keep them safe while they explore.
From Broody Hen to Proud Mama: A Journey Worth Taking
Hatching and raising chicks with a broody hen is one of the most rewarding experiences in chicken keeping. It’s far less work than running an incubator and brooder indoors, and watching a devoted mama teach her babies how to scratch, peck, and explore is pure joy. With a little preparation and support from you, your broody hen can successfully hatch a healthy clutch and raise confident, well-adjusted chicks.
If you’re new to broodiness, you may also find it helpful to read How to Deal with a Broody Hen for more tips on recognizing broodiness and managing the rest of your flock while she’s on the nest.
And if you’re curious about comparing natural hatching to artificial incubation, take a look at Incubator vs. Broody Hen: Pros and Cons for a deeper dive into which method works best in different situations.
However you decide to grow your flock, I hope this guide helps you feel confident, prepared, and excited for the journey. Here’s to happy hens, healthy chicks, and many heartwarming moments in your coop.
Resources and Further Reading:
- Hatching & Brooding Your Own Chicks by Gail Damerow
- Raising Chickens for Dummies by Kimberly Willis
- Storey’s Guice to Raising Chickens by Gail Damerow