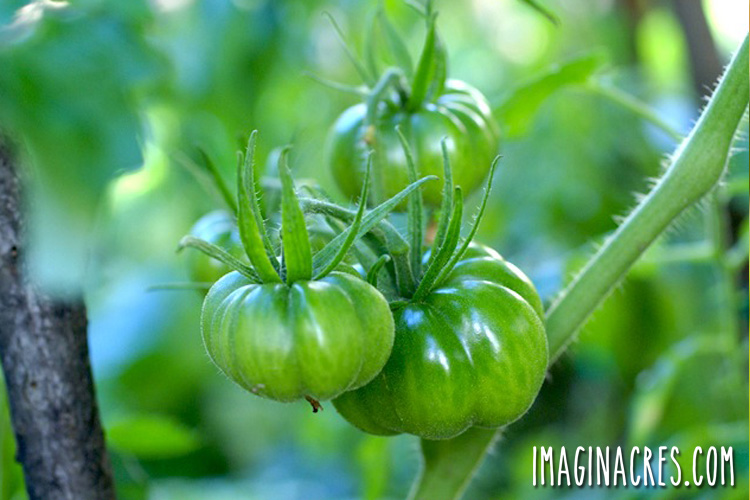
Growing tomatoes can be difficult, but with these 10 easy to understand tips, you will be an expert in no time!
Do you ever look through a gardening book expecting to be taught how to do something and then put it back down more puzzled than you were in the first place? Yeah, me too. It seems that every book out there is both too broad and vague or so in depth it’s impossible to grasp.

When I first started gardening, I read every book and website I could get my hands on. I found myself especially confused about tomato care. It seems everyone out there has a different opinion on the best way to grow tomatoes, and they all conflicted with each other.
All I wanted was a simple, easy to understand guide with tomato growing tips that I could actually implement. So, with that said, I think it’s high time someone wrote such an article.
Voila! Here it is: tomato care, demystified. I hope after you read this, you’ll feel more confident with that shiny green thumb of yours. So, without further ado, away we go!
[sc name=”AFFILIATE” ]
10 Tomato Growing Tips:
Tip #1: Start with the soil
I know how it is. You decide you’re going to grow tomatoes and get so excited you drive right to the store and pick up a six pack of tiny baby plants only to stick them right in the soil and wait for the magic to happen. For most people, that magic isn’t going to happen unless you first enrich that soil with compost, aged manure, worm casings or commercially made fertilizer.
Tomatoes are heavy feeders, they LOVE nutrients and will suck them right out of their surroundings until there’s nothing left. It’s up to you to make sure they have plenty to thrive on before you even plant.
Our city soil is terrible for growing plants, so we supplement big time by mixing homemade compost, rabbit manure, and aged chicken poo into the beds a few weeks before we plant. Aim for an organic, slow release granular fertilizer like Tomato Tone to get your plants off to a great start.
Tip #2: Don’t forget to prune
Tomatoes have these annoying little things called suckers that grow out from the crotches of the plant, the V between the main stalk and a branch. Yes, I know how bizarre suckers growing out of crotches sounds, but stick with me on this. The suckers need to be pruned off whenever you see them, even though they might grow to be functioning branches that produce fruit, you don’t want them. The plant will put most of its energy into producing foliage for these suckers, and put no energy into producing fruit.
Try rooting tomato suckers for a fun experiment! It’s like getting plants for free!

Tip #3: Choose the right fertilizer
Think of fertilizer like food for your plants. Different plants need different types of food, just as different types of animals need different food. You wouldn’t go feeding bird seed to a dog, would you? Or offer up a delicious zebra carcass to a rabbit? Of course not! Those animals require completely different diets and they’ll starve if you attempt to feed them the wrong thing.
Just the same, every plant requires different nutrients, and some needs even change throughout the growing season. There are tons of fertilizers out there specially formulated for tomatoes, use them. They contain the exact proportion of nutrients that your blossoming little babies need to succeed. We use Tomato Tone and it works wonders!
Tomatoes also need plenty of calcium to prevent blossom end rot. You can crush up egg shells and place them in the bottom of the planting hole before placing your seedlings inside to keep your tomatoes free of this horrid problem. If you don’t have access to egg shells, there are a variety of calcium boosters on the market.

Tip #4: Know the warning signs
Your plants will always tell you when something is wrong, it’s up to you to learn to look for it. Yellow or brown leaves, wilting, white spots, insect infestations, leaves dropping off, all of these cues mean you need to do something, and fast, to resolve the issue.
This is a good reference with photos to help you identify Tomato Diseases and Disorders
White Spots On Leaves: This is likely powdery mildew, which is caused by lack of air circulation, wet conditions, and lack of sun. This condition can’t be cured once it starts, but it can be prevented and controlled. Give your tomatoes as much space as you can, and practice watering them at the soil level in the morning, so the leaves don’t accumulate water and then sit in shade.
If you do experience powdery mildew, it can be cleared up by spraying down the leaves with, believe it or not, milk and water. Use a proportion of 9 parts water and 1 part milk in a spray bottle. Spray the leaves down a few times a week. This won’t get the mildew to go away completely, but should hinder its growth.
Yellow Leaves: Yellow leaves are so mysterious. This is usually the first sign that something is wrong, but it can mean so many things that it can be confusing. Think about your watering, have you been over doing it or under doing it?
A nutritional deficiency can also cause yellow leaves. Have you been frequently using a fertilizer that was made specifically for tomatoes? If not, get right on that. Check the plant thoroughly for bugs at all times of the day (some only show their nasty little faces at certain times). If you know none of these issues could be affecting your plant, read on, you likely have a bigger problem.
Blossom End Rot: You’ll know your tomato has this if it has a black, squishy spot on the end opposite the stem, where the blossom was. Blossom end rot is caused by a calcium deficiency, so make sure you either place crushed egg shells in the planting hole or use a fertilizer that has extra calcium to avoid it.
Wilting (Not Caused by Lack of Water): If you know you’re watering the tomatoes perfectly and they’re still wilting, Fusarium or Verticillium wilt may be to blame. These diseases are brought on by fungi in the soil that block water from getting to the plants, causing them to die of thirst.
Once your plant is affected, there’s no saving it and it must be torn out. Do this ASAP as leaving it in the garden will spread the disease to other plants. Be sure to throw it in the trash, not the compost, as the disease can spread to future crops if it isn’t properly disposed of.
Avoid these two wilting diseases by choosing varieties that are bred to resist disease, and rotate the location of your tomatoes every year.
Brown Spots on Leaves: Early blight shows itself on the older foliage of the tomato plants as small, brown lesions. Spots expand and a bull’s-eye pattern may be seen in the center of the diseased area. Eventually, the tissue surrounding the spots will turn yellow, and then brown as the leaves die.
Early blight survives from year to year in the soil, rotate your tomato crop, mulch the soil surface, and cut off infected leaves.
Blackening of Leaves and Fruit: This is usually caused by the all mighty late blight. Your tomato plant may have blight if the edges of leaves are turning brown or black, or the plant has brown splotches all over it, with rotting fruit.
Late blight is nasty business. To help prevent it, rotate the tomato bed every year and grow varieties that are disease resistant. Be sure to give each plant plenty of space around it to allow for air circulation (those babies need to breathe to succeed!), and water at the soil level.
There are also fungicides available on the market that can be used throughout the growing season to prevent blight from becoming your worst nightmare.
Unfortunately, late blight is not a treatable disease and it will kill your plants. Learn more here: What to Do When Late Blight Strikes Your Tomatoes
Tip #5: Grow varieties meant for your zone
If you live in a climate that sees four seasons and winter lasts way too long and starts way too early, do you think you should be growing crop varieties that don’t mature for 200 days? Of course not. You need your tomatoes to set fruit early enough in the season that they can ripen before the days shorten and cold air starts nipping.
Don’t be deceived by fancy packaging and promising guarantees, read the seed packets carefully to be sure the type you choose will have time to thrive in your location.
Tip #6: Go deep on transplants
When you’re transplanting tomato seedlings, make sure you’re burying the majority of the stem every time. The soil line should be right under the first leaves. This allows roots to sprout out of the stem, giving you a stronger plant that can stand on its own.
This simple trick will give you a hardy plant with a large and strong root system. Think of this kind of like building a skyscraper. Structures need a solid foundation in order to stand tall. Think of your tomato root system like a building’s foundation, they need to be large and strong for your plant to succeed.
Tip #7: Water consistently
Have you ever had the most perfect, glorious fruit dangling from stems, just about to ripen, and then pop! They burst open in a giant crack, opening them up to disease and pests? This results from inconsistent watering.
If your plants are getting watered every two days, then go 5 days without watering, then get flooded, the fruit is going to burst from the pressure. Kind of like when you go on a diet, loose a lot of weight, and your stomach shrinks down to a normal size, then you eat Thanksgiving dinner and your shirt buttons can barely contain your burgeoning belly.
Get in the habit of checking if your plants need water. Stick your whole finger into the soil, if the soil is dry at the tip of your finger, you definitely need to water. Purchasing a moisture sensor would be a great investment so you don’t ever have to wonder if you’re watering at the right time.
Speaking of time, the best time to water tomatoes is in the early morning, before the heat and sun start hitting your garden. Water the plants at the soil level rather than on the leaves. Tomatoes are a bit like cats, they hate getting wet, and wetness on the leaves can lead to all sorts of troubles you don’t want to deal with.
Tip #8: Take care of pests naturally
You didn’t spend all of this time and effort to grow big beautiful tomatoes just to spray them down with poison did you? I didn’t think so! Grow healthy and strong plants so they can stand up to pests. Insects have a tendency to attack stressed plants, so keep your plants healthy and happy by following all of these lovey tips and you’re less likely to get an infestation.
Planting herbs and flowers next to tomatoes also may help deter bugs from eating your precious babies. Basil, oregano, garlic, marigolds, and nasturtiums are all helpful to keep the bugs away.
Insects can be plucked off and tossed in a bucket of soapy water or sprayed off the plants with a hose.
Rotate the location of your tomato plants yearly. Many pests overwinter in garden soil and awaken to wreak havoc on their favorite plants that are conveniently right where they left them last year. Don’t give them this advantage. Planting your tomatoes in a different bed each year will confuse these pests and far fewer of them will end up eating your plants.

Tip #9: Cage or stake those babies early and properly
Have you ever tried to get a jacket on a small child that is throwing a fit and flailing their arms? Or tried to get a cat in a pet carrier when it clearly doesn’t want to go?
This is what it’s like trying to cage a tomato plant too late in the game. The branches pop out at every angle, the leaves smack you in the face as you try to wrap a tiny wire cage over a 5 foot tall sprawling plant.
Plan ahead and have your tomato cages or stakes ready to go before you plant. Putting them in right after you put the transplants in the soil is the very best time. Train them young to stay in their cage and you won’t have any troubles.
When it comes to staking tomatoes, everyone has their own way of doing it. We have tried home made trellises and stakes and found them to be rather ineffective. Wire cages only work well for short varieties but won’t be able to contain a 7-foot plant.
Check out these 9 Creative DIY Tomato Trellis Ideas
The choice is yours, but be sure to place your cage or stakes in while the plant is still tiny, to avoid disturbing the roots. Also be sure that whatever you use is very secure, and will be able to withstand wind, leaning plants, and ground softened by water. Trust me on this one, you don’t want to spend 2 months growing a six foot tall plant only to have one wind storm destroy it by blowing it over, stake and all.

Tip #10: Rotate your tomato patch yearly
So many problems with tomatoes can be avoided simply by rotating the location of the tomato bed every year. Tomatoes should never be planted in the same location more than once every three years. Pests and diseases that love to attack tomatoes sleep in that soil all winter, just waiting for spring to come so that you’ll plant your tomatoes right on top of them and they can attack. Simply planting in a different bed every year will befuddle these troublemakers and greatly decrease your chances for problems.
So, to review… the most important tomato growing tips to remember:
- Water consistently and at the soil level to avoid getting the leaves wet
- Fertilize regularly with a tomato fertilizer
- Choose varieties that are right for your location and resistant to disease
- When transplanting, bury the stem up to the first leaves
- Cage or stake tomatoes to keep them standing upright
- Supplement the soil before planting with compost or fertilizer
- Rotate the tomatoes to a new garden bed every year
- Keep an eye out for problems and treat them or remove the plant as soon as they present themselves.
- Prune suckers to promote fruit growth
That’s it! Easy, right? There’s no need to stress about growing tomatoes, and with these tips at your, well, fingertips, you’ll never struggle with your plants again.
Now that you’re officially a tomato growing expert, it’s time you get out there and try your hand at it! I would also love to hear your go-to tomato growing tips in the comments. I read and cherish each and every one.
Related Posts


Wonderful! I’ve grown a bunch (too many) tomatoes from seeds and will be hardening them off starting this Friday. They go in the ground the Friday after that. I have bookmarked this page and will be returning to it relentlessly as I go. Thanks for taking the time to put together such a detailed post. Tomato power, yo!
Thanks Amy! I hope it’s helpful for you as you embark on this tomato growing journey. Feel free to ask any questions that may pop up. We spent years failing at growing tomatoes so we’ve learned quite a bit!
Don’t forget you can plant those suckers in a pot of well-watered dirt to grow clones of the parent plant! I started doing that this year, and it was very successful!
I’ve purchased those tomato stakes you recommended at a local garden store by me. They work OK with some plants, but buckle under the weight of tall heavy loaded tomato plants.
Thank you for letting me know Deborah. We use them for our determinate varieties and they work well, but I’ll make note of the fact that they won’t function with indeterminate varieties.
I use 5 ft x 8 ft fence panels to use for staking my tomatoes. I grow about 3 tomatoes per panels, 4 ft apart. I attach them with plant tape and feed them through like vines….it has worked great for us.
Love your information on Tomatoes. When I trimmed the suckers I put the sucker trimming in a jar of water and root them to start a new plant. They produced lots of roots. This is the 1st time I have tried this so I hope it works. It is a black tomatoe. Have you tried it?
Thank you, Meredith! Now if you can just get an answer to growing tomatoes in a shady yard, I will be in tomato heaven! Home grown tomatoes are the best!