What Do Baby Chicks Need? How to Prepare for New Chicks
Baby chicks are so small, so cute, so soft, and so fun to watch! They are also noisy, dirty, hungry, and needy. Before you give in to the emotions stirred up by their cuteness and bring a dozen home, get prepared for baby chicks so both you and they can be happy.

Baby chicks are so small, so cute, so soft, and so fun to watch! But their cuteness comes with a surprising amount of noise, mess, and round-the-clock needs. Before you give in to the emotions stirred up by their cuteness and bring a dozen home, get prepared for baby chicks so both you and they can be happy.
Springtime is the ideal time to add baby chicks to your homestead. Whether you’re hatching your own eggs, adopting chicks from the local farm store, or receiving day old chicks in the mail, proper preparation will set you and your new flock up for success.
Sometimes, if the stars align, you can trick a broody hen into adopting baby chicks, but most often you’ll need to mimic the warm, safe environment a mother hen provides. The better prepared you are before the chicks arrive, the smoother the whole chick raising process will be, and the greater your chances of raising them into healthy adults.
What Baby Chicks Need Before You Bring Them Home
Before you walk out of the feed store (or open a box of chirping mail-order chicks), it’s important to understand what baby chicks need to stay healthy in those first crucial weeks.
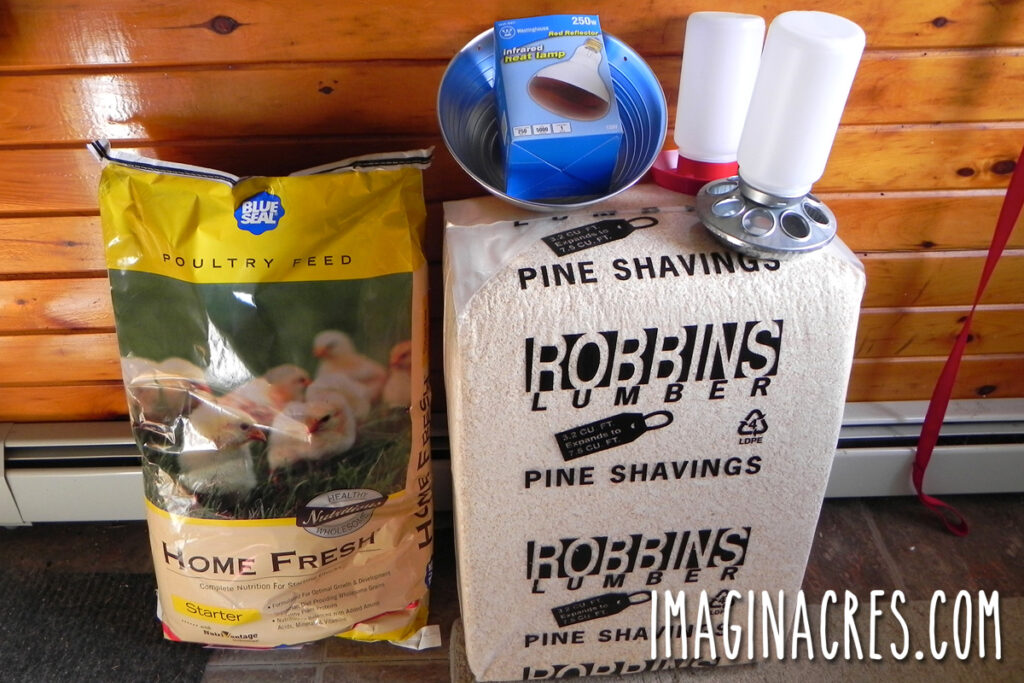
Raising baby chicks starts with having the right supplies ready before they arrive. Here’s a quick look at the essentials you’ll need, followed by a deeper look at each one.
At a Glance: Baby Chick Essentials: These are the basic supplies every new chick owner should have ready before pickup day:
- A safe brooder (plastic tote, stock tank, wading pool, etc.).
- A heat source (heater plate or safely secured heat lamp with a red bulb).
- Pine shavings for bedding.
- Chick starter feed (medicated or non-medicated).
- A shallow chick waterer.
- Electrolytes for the water (especially for shipped or stressed chicks).
- Supplemental light if your room is dark.
- Paper towels for the first few days.
- A clean, draft-free location.
- Thermometer (if using a heat lamp).
1. A Safe Brooder Setup
A brooder is the warm, enclosed area where chicks live for their first 6-8 weeks. It doesn’t need to be fancy, just safe, draft-free, and large enough to grow with your birds.
Great choices for chick brooders:
- Large plastic tote bins.
- Galvanized stock tanks.
- Child’s wading pools.
- Wooden boxes or DIY brooders.
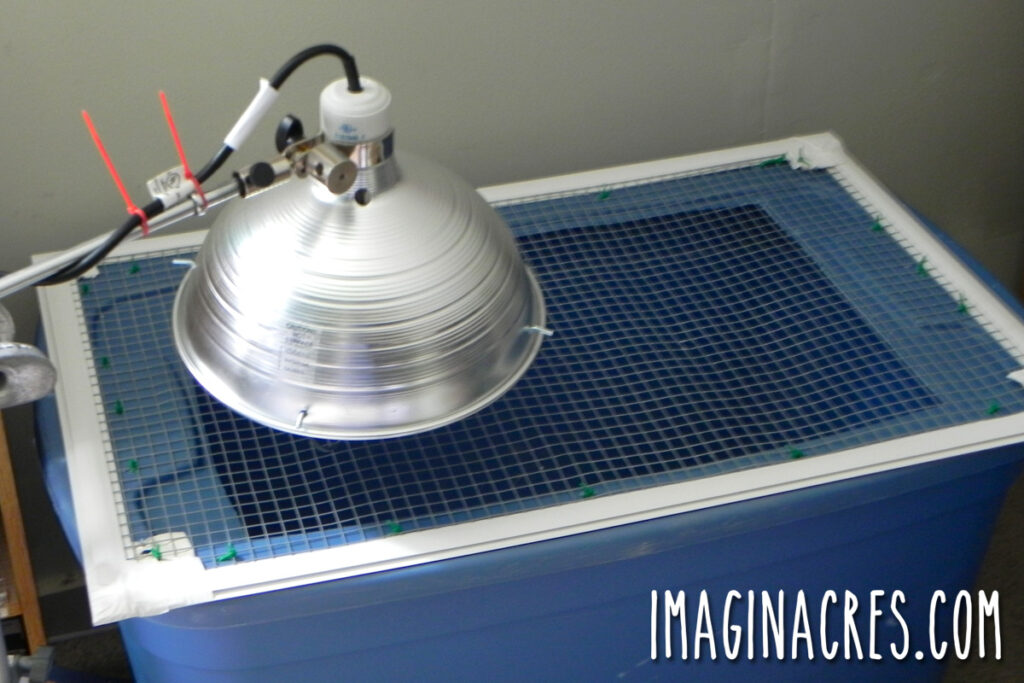
Anything that will keep the peeps enclosed in a safe area and withstand heat from a heat lamp (if using). A makeshift cover made of hardware cloth will help keep the chicks contained, curious pets out, and allow air circulation.
How much space do baby chicks need?
Plan on at least 1/2 square foot (72 square inches) per chick to start, but chicks grow fast, so bigger is always better.
Your brooder should be large enough to accommodate:
- A warm area under the heat.
- A cooler area to escape the heat.
- Room for a feeder and waterer.
- Enough space for chicks to spread out.
2. Heat: The Most Important Thing Baby Chicks Need
Because chicks can’t regulate their own temperature, they need a steady heat source for the first several weeks.
You have two main options:
Option 1: Heat Lamp (Effective but Fire-Risky)
A 250-watt infrared bulb can keep chicks warm, but it must be secured safely:
- Double-clamp it.
- Keep it far from bedding.
- Ensure you can adjust the height.
- Keep spare red bulbs on hand.
Place a thermometer at chick level to monitor the brooder’s temperature, aiming for 90–95°F during the first week of life. Then lower the brooder’s temperature by 5°F per week until it reaches room temperature (65–70°F) before six weeks of age. Most chicks are fully feathered and ready to live without supplemental heat by 5–6 weeks of age.
Heat lamps can start a fire if knocked over and come in contact with combustible material. If you choose to use a heat lamp, be sure to secure it very well. Always use a secure clamp plus a backup safety chain when hanging a heat lamp.
Option 2: Heat Plate (Safest Choice)
Heat plates (like the Brinsea Ecoglow) mimic a mother hen:
- Very low fire risk.
- No harsh lights.
- More natural chick behavior.
- Long-lasting and reliable.
You can’t measure temperature with a thermometer. Instead, watch the chicks. If they’re huddled under the plate and cheeping loudly, it’s too cool.
3. Bedding: What to Put in the Brooder
Pine shavings are our favorite bedding material for brooding baby poultry because they are:
- Absorbent.
- Affordable.
- Easy to clean.
- Compostable.
Avoid cedar shavings, the aromatic oils can irritate tiny lungs.
Keep extra bedding on hand. Chicks create a shocking amount of dust and odor in a very short time.
4. Food and Water: What Baby Chicks Need Daily
Chicks need access to food and water at all times. Baby chicks grow very quickly, and they need to continually fuel their little bodies.
Chick Starter Feed
All chicks need chick starter feed, which is formulated to provide proper vitamins and nutrition for growing baby chickens. It is also processed to a small size to accommodate their tiny beaks.
Two types:
- Medicated helps manage coccidiosis exposure.
- Non-medicated is ideal if chicks were vaccinated at the hatchery.
Medicated chick starter food includes a medicine that helps prevent coccidiosis in your young flock. Coccidiosis is one of the most frequent causes of death in baby chicks. It is caused by a parasite called coccidia oocysts that is found everywhere. Once ingested, the parasite multiplies rapidly in the intestines and makes your chicks sick.
One way to help protect your birds against this disease is to feed a medicated chick starter. The medication helps keep the coccidia population down so the chicks can develop resistance over time.
Use non-medicated chick starter feed if your chicks were vaccinated for coccidiosis at the hatchery.
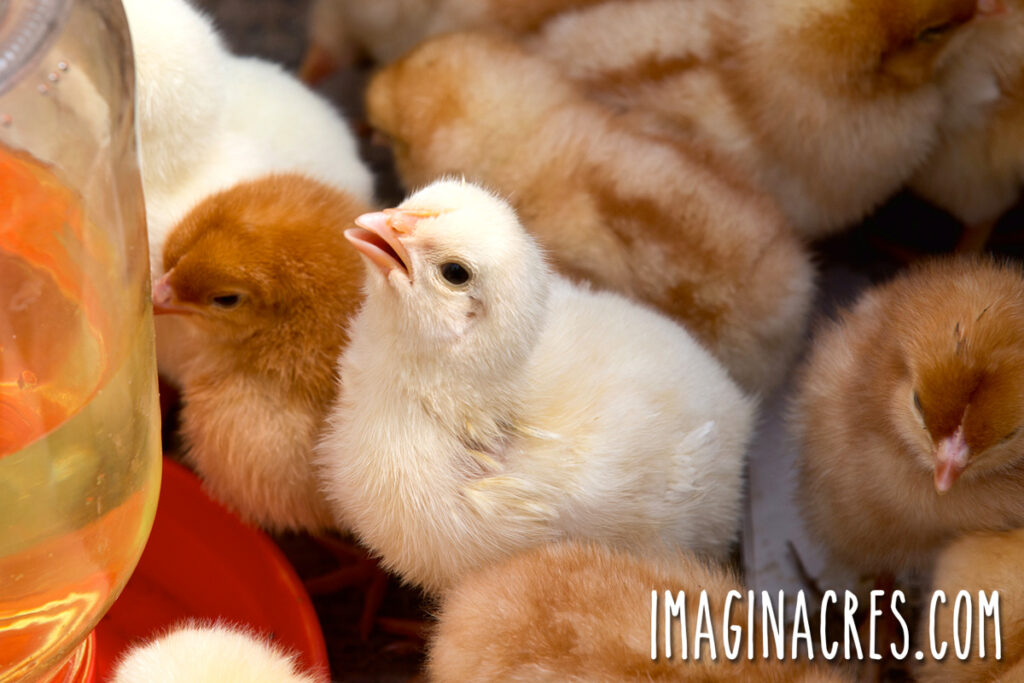
Chick Feeders
There are various types of chick feeders on the market. Most have a slotted covering to prevent chicks from scratching and walking in the feed. I like using the round chick feeders with mason jars or the longer trough feeder.
If you’re raising a larger batch, it’s a good idea to have a couple on hand to place in different locations in the brooder.
Chick Waterers
Baby chicks need fresh, clean water available at all times, but the waterer should not be very deep, or chicks may accidentally drown.
Tips to prevent drowning:
- Use shallow chick waterers.
- Add marbles or stones to keep the water shallow.
- Change the water 1-2 times a day or when soiled.
- Elevate the waterer slightly to reduce bedding being kicked in.
I like using the mason jar waterer base and swap out jars of clean, fresh water as needed. They are very inexpensive, so you may want to get several to make it easy to exchange daily for cleaning.
Electrolytes
It’s a good idea to have powdered electrolytes on hand before your chicks arrive. These help rehydrate chicks that are stressed from shipping, temperature changes, or travel from the feed store. Mix according to the package directions and offer for the first day or two, or anytime chicks seem droopy or dehydrated. After they perk up, return to plain fresh water.
5. Light: How Much Do Baby Chicks Need?
Your chicks will need light either from natural light from a window or a supplemental light source.
The internal clock that regulates their sleep and wake cycle has not yet been set, and they will eat and drink around the clock for the first few days.
Provide continuous light for the first 48 hours while the chicks adjust to the brooder and learn where to find food and water.
After the first 48 hours, they need 8 to 12 hours of darkness each night to rest.
If the room gets plenty of natural light during the day, you may not need any additional lighting. However, if the brooder is continuously dark, you will need a supplementary light source. Turn off the lights when you go to bed at night, and turn them back on in the morning.
Continuous light is unnatural and unhealthy for chickens. If you are using a heat lamp, use a red light bulb to help reduce stress and discourage the chicks from picking at each other.
What to Do Before the Chicks Arrive
Before you bring home your fluffy new arrivals, take a little time to get everything ready ahead of time. A warm brooder, a safe heat source, and set-up food and water will make those first few hours calm and stress-free for both you and the chicks.
1. Prepare the Brooder
Set up the brooder so your chicks can go inside immediately when you get home.
- Clean and disinfect the brooder if you are reusing one from a previous batch.
- Add about 2 inches of pine shavings to the bottom.
- Cover the shavings with paper towels for the first 2–3 days. This gives chicks a firm surface to walk on and prevents them from eating shavings before they understand what food is.
- Place the brooder in a safe, warm area, away from drafts that you won’t mind getting dirty.
Brooding chicks is messy. Within a few days, you’ll notice a fine layer of dust coating everything. Many people prefer brooding in a basement or an unused bathroom, which can be thoroughly cleaned once the chicks move outside.
Watch for Rodents and Protect the Brooder
If your brooder is set up in an outdoor coop, barn, garage, or outbuilding, keep an eye out for rodents:
- Mice, chipmunks, and squirrels are attracted to chick feed and can introduce disease.
- Rats will prey on young chicks if given the chance.
Protect your brooder enclosures from predators with a secure hardware cloth lid and consider perimeter traps if needed: Tips to Deal with Rats and Rodents in the Chicken Coop.
2. Get the Heat Source Running
Turn on your heat source a few hours before the chicks arrive so the brooder box is warm and ready. Always check the floor temperature before placing chicks inside.
If Using a Heat Lamp
- Make sure the lamp is securely attached and cannot fall into the brooder.
- Keep the bulb out of reach of the chicks and away from bedding or walls.
- Place a thermometer at chick level to monitor temperature.
- Adjust the height to reach 90–95°F for the first week.
- After week one, reduce the heat by about 5°F per week by gradually raising the lamp.
If Using a Heat Plate
Set up according to the manufacturer’s instructions. Some models have temperature controls, while others adjust only by height. The plate should always be low enough that chicks can brush their backs on it for warmth.
Tips for heat plates:
- Start with a slight angle: higher in front and lower in back so tiny chicks can move under easily.
- Raise the plate weekly as the chicks grow. Many models have numbered legs to help you track height.
Because heat plates use radiant heat, you can’t rely on a thermometer. Instead, watch the chicks:
- Too hot: Chicks avoid the plate or stay only at the edges.
- Too cold: Chicks huddle tightly under it and chirp loudly.
- Just right: Chicks rest quietly under the plate and move in and out of warmth comfortably.
3. Set Up Food and Water
Chicks need access to fresh food and clean water the moment they arrive.
- Fill feeders with chick starter feed.
- Add fresh water to chick waterers.
- Place both away from the heat source to prevent feed spoilage and keep water cool.
- Elevate feeders and waterers slightly (a board works well) to keep shavings out.
- Add marbles or small stones to the waterer bowl to prevent chicks from accidentally falling or flopping into the water.
- If you’ve had chicks shipped or one seems weak, start the first 24 hours with electrolyte water to help them rehydrate and recover from travel stress.
Keeping everything clean and accessible from the start helps your new chicks settle in quickly and safely.
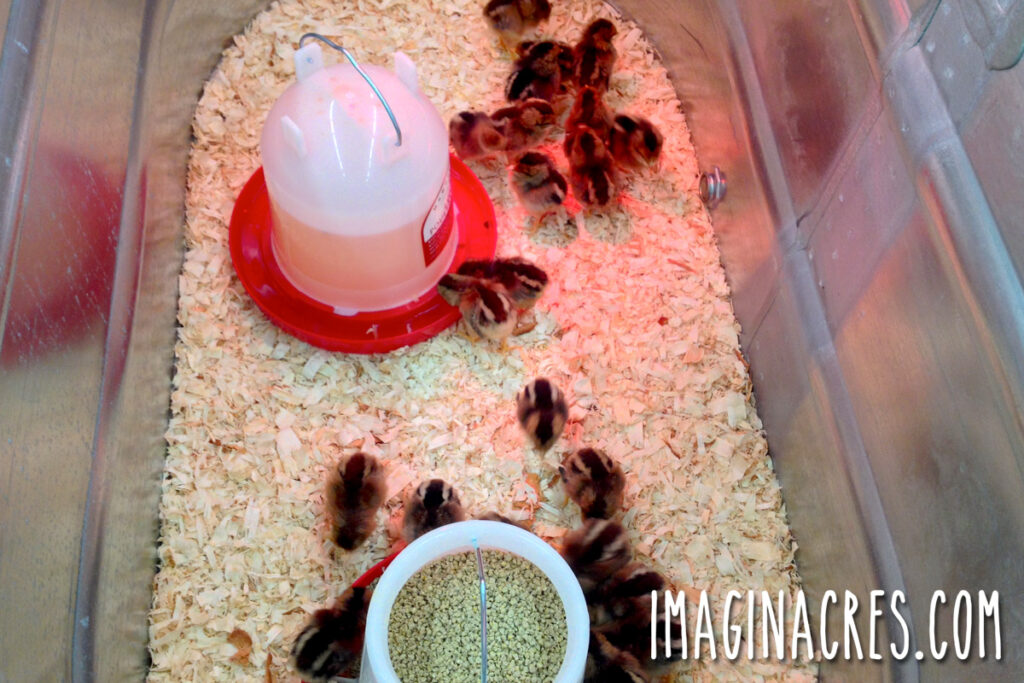
4. When the Chicks Arrive
Once your brooder is warm and everything is set up, you’re ready for the exciting part: Bringing your chicks home. The first hour is important, but it doesn’t have to be stressful.
Gently place the chicks into the brooder
Move the chicks one at a time, giving each a moment to get their bearings. Place them near the warm area, but not directly under the heat source.
Dip each chick’s beak in the water
This helps each chick learn where the waterer is. Just a quick touch is enough. They’ll pick up the rest on their own.
Watch their behavior closely
Their behavior will tell you if the setup is right:
- Too warm: Chicks spread far apart, pant, or avoid the heat source.
- Too cold: Chicks huddle tightly together and chirp loudly.
- Just right: Chicks move around freely, exploring, eating, drinking, and resting.
Adjust the heat source as needed and check again in 10–15 minutes.
Offer electrolytes if needed
If your chicks seem weak or stressed from travel, start them off with electrolyte water for the first 24 hours. This gives them a quick boost and helps them recover from the journey. After that, switch them back to plain fresh water.
Give them time to settle
Check on the chicks often during the first few hours, but try not to hover too much. Let them rest between short check-ins. The first day is mainly spent eating, drinking, sleeping, and getting to know their surroundings. Keep noise low, handle them gently, and let them rest between check-ins.
Watch for pasty butt
During the first few days, keep a close eye out for pasty butt, a common issue where poop droppings stick to a chick’s vent and block them from pooping. It’s usually caused by stress or temperature fluctuations and is easy to fix when caught early.
If you notice buildup, gently clean the area with warm water and a soft cloth, then dry the chick before returning it to the brooder. Catching it early helps prevent more serious complications.
Pasty butt is common in the first week, especially with shipped chicks, and most grow out of it quickly once the brooder temperature is stable.
Keep everything clean
Baby chicks are tiny, but they can create a surprising amount of mess in a very short time. Check the brooder often and tidy up as needed. Replace wet or soiled bedding, change the water twice a day, and keep the feeder full. Wash the waterer and feeder as needed to keep everything clean and fresh. A clean brooder helps prevent pasty butt, coccidiosis, and respiratory issues, keeping your new chicks healthy as they grow.
You’re All Set for Your Chicks’ Big Arrival
Raising baby chicks is one of the most rewarding parts of keeping chickens, and getting this setup right will make the whole experience easier and far more enjoyable. Once your brooder is warm, safe, and ready, and your new arrivals are settling in, you’re officially off to a strong start in giving your baby chicks everything they need to thrive.
From here, you’ll begin watching your chicks grow, feather out, explore, and develop their little personalities. To continue the journey, your next stop is: How to Raise Baby Chicks in a Brooder: The First 6 Weeks.