How to Grow Salad Greens in a Window Box
Growing salad greens in a window box is an excellent way to use a small space for growing food. Once it is planted, you only need to water and harvest the plants.
This summer, you can have fresh salads at your fingertips by growing lettuce, spinach, kale, and other greens in a window box container garden.

Having a fresh salad every day is one of the healthiest habits you can develop. Salad greens are packed with vitamins, minerals, antioxidants, and fiber that boost your nutrition and well-being.
The problem is that prepackaged salads from the grocery store often lack freshness and flavor. Also, with frequent recalls over contamination, you take your chance with bagged lettuce from the grocery store.
The best salads start with the freshest ingredients from your local farmer’s market or even better, grown right at home.
If you don’t have space for a vegetable garden, a window box is a great option for growing salad fixings. You’d be surprised how productive a container garden on your window, patio, or deck can be. Read on to learn how to plant and cultivate a bountiful windowsill harvest of leafy greens for amazing salads all season long.
Tips for Growing Your Own Salad Greens in a Window Box
Transforming a humble window box into a flourishing salad garden is surprisingly simple with a bit of guidance. By following these tips, you’ll be well-equipped to create a bountiful and flavorful salad garden right outside your window.
Choosing a Window Box
Window boxes come in all shapes, sizes, and materials, including wood, plastic, and metal. Consider the location where you’ll mount your box when making a selection. Make sure the box itself can stand up to the elements and won’t rot or fade in the sunlight. Also ensure the box is firmly secured.
For most standard windows, a box approximately three feet long by six to eight inches deep works well. This gives you about one square foot of growing space, which is sufficient to keep one or two people supplied with enough leafy greens for side salads.
Opt for larger boxes if you want big bountiful harvests. Add brackets and mount the boxes securely before filling them with soil, or place the containers on your patio or balcony.

Best Greens for Window Box Planting
Nearly all salad plants grow well in containers and window boxes. Go for a mix of greens to create colorful and nutrient-packed mixed salads. Some of the best picks include:
- Lettuces: The most universal salad green! Lettuce varieties include numerous colors and leaf shapes ranging from crispy Romaine to buttery Bibb and cut-and-come-again leaf types. Great for mixing and matching.
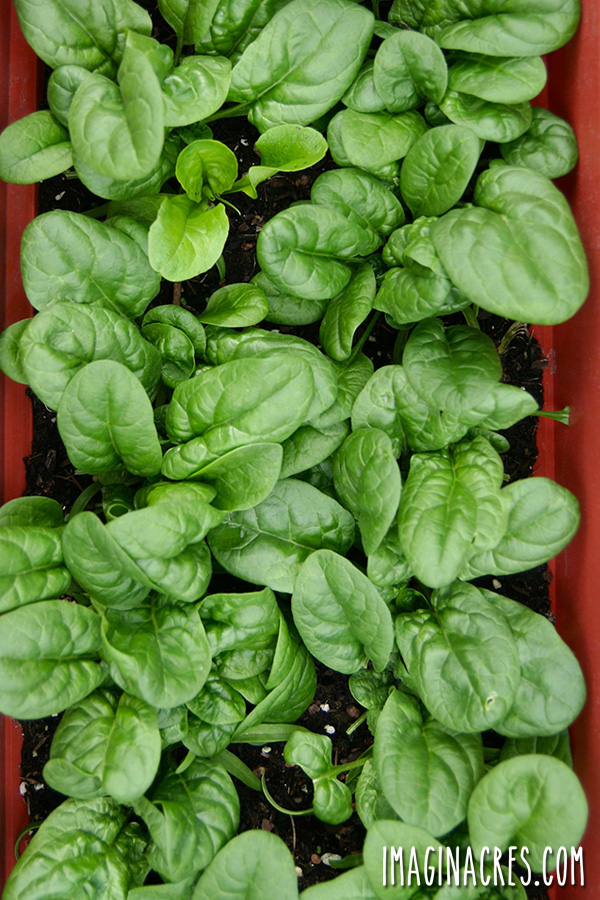
- Spinach: A super healthy green that grows quickly and produces both baby and mature leaves for salads. We even grow spinach indoors in winter!
- Kale: Nutrient-packed kale handles confinement well and grows beautifully in window boxes.
- Arugula: A spicy green that adds a tangy kick to salads.
- Swiss chard: Its colorful stems and tender greens are as ornamental as delicious.
- Mesclun: A mix of baby lettuces and greens that provides variety from just one planting.
- Herbs: Many herbs also do well in window boxes for salad toppers. Try basil, parsley, cilantro, and dill.
Additionally, consider incorporating the following greens for added variety and flavor:
- Mizuna: This Japanese mustard green has a mild, peppery flavor and attractive, frilly leaves.
- Radicchio: A bitter leafy vegetable that adds color and complexity to salads with its deep red leaves.
- Asian Greens: Include tatsoi, Chinese cabbage, and various mustards for a mix of textures and flavors.
By incorporating these diverse greens into your window box garden, you’ll create a vibrant and flavorful array of salads to enjoy throughout the season.

Select the Right Location
The success of your window box salad garden heavily relies on the environment it’s placed in. The suitability of the location varies depending on the season.
If you are growing your salad greens in the cool weather in the spring or fall seasons, an area that receives full sun is ideal. In summer, ensure the plants get morning sun with afternoon shade to prevent heat stress that can cause premature bolting (when the plant goes to seed).
By carefully selecting the right environment for your window box garden, you can create an ideal setting for growing vibrant and flavorful salad greens year-round.
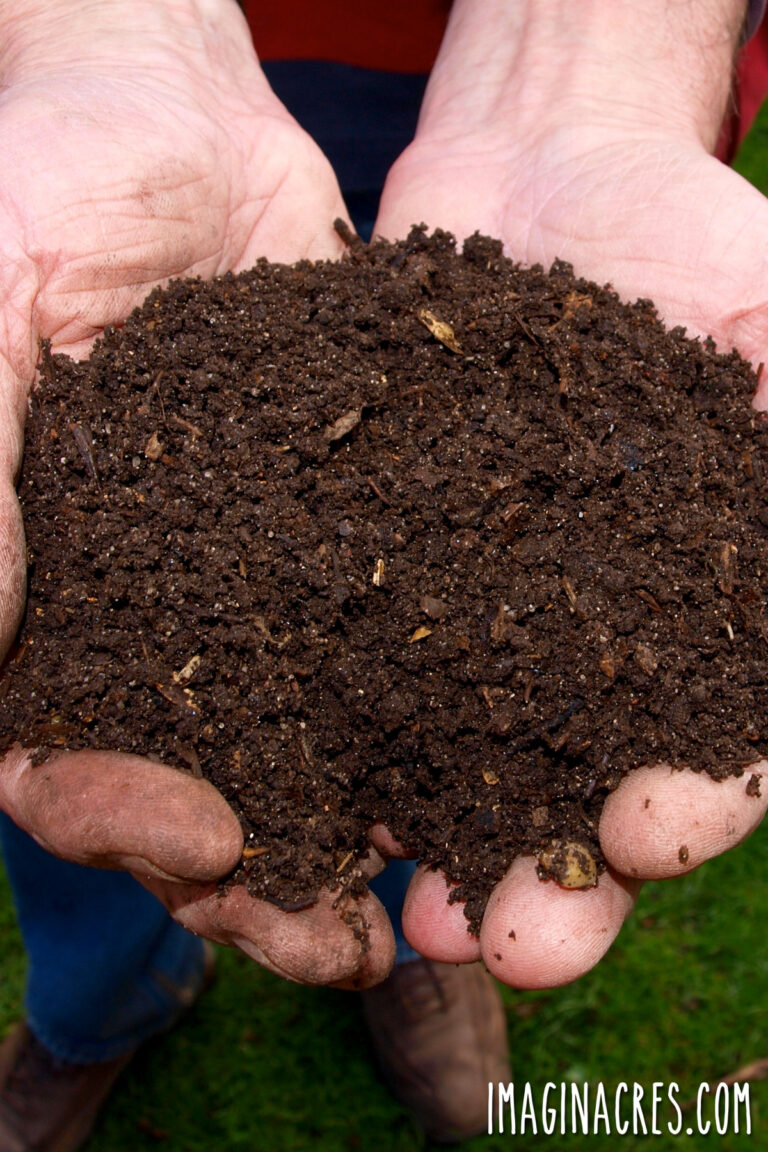
Use a Good Soil Mix
The key to growing lush and healthy greens in a compact space like a window box is providing them with very nutrient-rich soil. Choose an organic potting mix formulated specifically for vegetables and containers. This will ensure excellent drainage, which container plants require.
Before planting, mix in a granular organic vegetable fertilizer as well as some compost or composted manure, which acts as a nutrient supercharger.
Dry organic fertilizers can be added sparingly throughout the season to keep plants thriving. Vermiculite or perlite can be added to improve moisture retention in containers.
Planting in a good quality, nutrient-rich potting mix will give your salad greens the essential nutrients and moisture they need to thrive in a window box setting.
How to Get Your Greens Started
One of the joys of growing your own greens is selecting from the many colorful varieties of lettuces and greens available from seed companies. You can choose mixes suited specifically to container gardening. Alternatively, you can buy seedling transplants from your local nursery so your greens get off to an even quicker start.
Follow these steps for successful planting:
- Select Your Salad Greens: Choose the salad greens you want to grow. Popular options include lettuce, arugula, spinach, kale, and Swiss chard. Ensure that the selected varieties are suitable for container gardening and will thrive in your climate.
- Seed Package Guidance: Refer to the seed package for specific instructions on sowing seeds. Note the recommended seed starting time, sowing depth, spacing, and thinning requirements.
- Choose a Suitable Container: Select a window box at least 6 to 8 inches deep with drainage holes at the bottom. The container should be large enough to accommodate the number of plants you wish to grow and allow for adequate root development.
- Prepare the Window Box: Fill the container with a high-quality potting mix formulated for containers. Mix in organic fertilizer according to the instructions. Leave about an inch of space between the soil surface and the rim of the container to allow for watering.
- Sow Seeds: Make shallow furrows or depressions in the soil with your finger or a small tool, following the spacing recommendations provided on the seed packet. Drop the seeds into the furrows, spacing them out according to the recommendations on the seed packet. Cover the seeds lightly with soil, gently patting down to ensure good seed-to-soil contact.
- Transplant Seedlings: If planting seedlings, dig holes large enough to accommodate the root ball. Carefully remove the plant from its container and place it into the hole, ensuring that the soil level matches that of the seedling’s original container. Fill in around the seedling with potting mix, gently pressing down to firm the soil around the roots.
- Water: Use a watering can with a fine rose attachment or a misting spray bottle to water the soil lightly. Keep the soil consistently moist but not waterlogged during the germination period.

Caring for Window Box Greens
Set your window box greens up for success by providing optimal growing conditions throughout the season, including:
- Sunlight: Most leafy greens need at least 4 to 6 hours of direct sunlight daily. Place the container in a location that receives adequate sunlight. If the temperatures are warm, make sure the window box is shaded during the hottest part of the day.
- Water: Check soil moisture daily. Because containers drain quickly and can dry out rapidly, you’ll need to water frequently to ensure consistent moisture. Provide greens with approximately one inch of water per week from rain or irrigation.
- Fertilizer: Every 2 to 3 weeks add soluble organic fertilizer, like liquid fish emulsion to provide a nutritional boost during the growing season.
- Temperature: While most greens tolerate temperature fluctuations, consistent cooler temperatures typically improve flavor. Move the box to a shadier location or indoors if temps exceed 80˚F.
- Harvest Frequently: As your tasty greens grow, gently thin overcrowded plants for proper air circulation and growth room. Use scissors to cut at the soil level to thin out plants. Harvest outer leaves once they reach approximately 3 inches long by cutting individual leaves from the outer parts of the plants. This stimulates continuous production so you enjoy ongoing harvests.
With minimal care, you can grow robust and delicious greens nearly year-round.
Troubleshooting Tips
Growing salad greens in a window box offers convenience and accessibility, but it’s not without its challenges. Here are some common issues you may encounter and strategies to address them:
- Pests such as slugs, snails, flea beetles, and other insects can damage salad greens by chewing holes in leaves or causing other damage. Use physical barriers, such as row covers, to deter pests.
- Bolting occurs when salad greens prematurely produce flower stalks and go to seed, typically due to stress from high temperatures or inconsistent watering. Provide adequate sunlight without excessive heat exposure and consistent watering to prevent bolting.
- Diseases: Salad greens can be susceptible to diseases such as damping-off, powdery mildew, and leaf spot. Provide good air circulation, avoid overcrowding plants, and practice sanitation by removing diseased plant material promptly to prevent the spread of disease.
- Nutrient Deficiencies: Inadequate nutrition can lead to poor growth and nutrient deficiencies in salad greens. Monitor plant health for signs of nutrient deficiencies and fertilize with a balanced fertilizer or organic amendments to replenish soil nutrients as needed.
- Watering Issues: Overwatering or underwatering can stress salad greens and affect their growth and productivity. Monitor soil moisture regularly and water plants deeply when the top inch of soil feels dry. Ensure proper drainage in the window box to prevent waterlogging.
- Environmental Stress: Extreme temperatures, strong winds, and fluctuations in weather conditions can stress salad greens. Provide protection from harsh weather conditions by relocating the window box to a more sheltered location when necessary.
By addressing these common challenges proactively, you can enhance the success of your window box salad garden and enjoy a bountiful harvest of fresh, homegrown greens.

Expanding Your Container Salad Gardening
Once you’ve mastered the basics of planting greens in your window box, consider trying other vegetables that do well in containers. Bush beans, radishes, beets, and green onions can all thrive alongside your leaf lettuce. Herb companions like chives, thyme, and basil also grow beautifully in window boxes.
Before you know it, you’ll have a productive container veggie and herb garden supplying you with the freshest, healthiest salad ingredients imaginable. There’s nothing quite as satisfying as growing your own food – especially salad greens which retain maximum vitamins and antioxidants when consumed immediately after harvesting.
So go ahead and give window box gardening a try this season. Follow these simple tips for planting and care for a rewarding harvest of salad greens at your fingertips. Your homemade salads will be so flavorful you may never want to buy prepackaged greens again!
I hope these tips help you harvest big yields from a window box salad garden.
Do you grow vegetables in containers? Have any tips to share? Let us know in the comments.